Settings
Settings
The Settings page lets administrators configure system-wide behavior: login and session settings, workstation defaults, system log retention, default and environment-specific permissions, and (on cloud deployments) autoscaling. You can manage settings through both the GUI and the CLI.
GUI
Open Settings from the left sidebar by clicking the Settings 
 icon.
icon.
The page is organized into five top-level tabs: General, Default ACLs, Environment ACLs, Page ACLs, and Autoscaler.
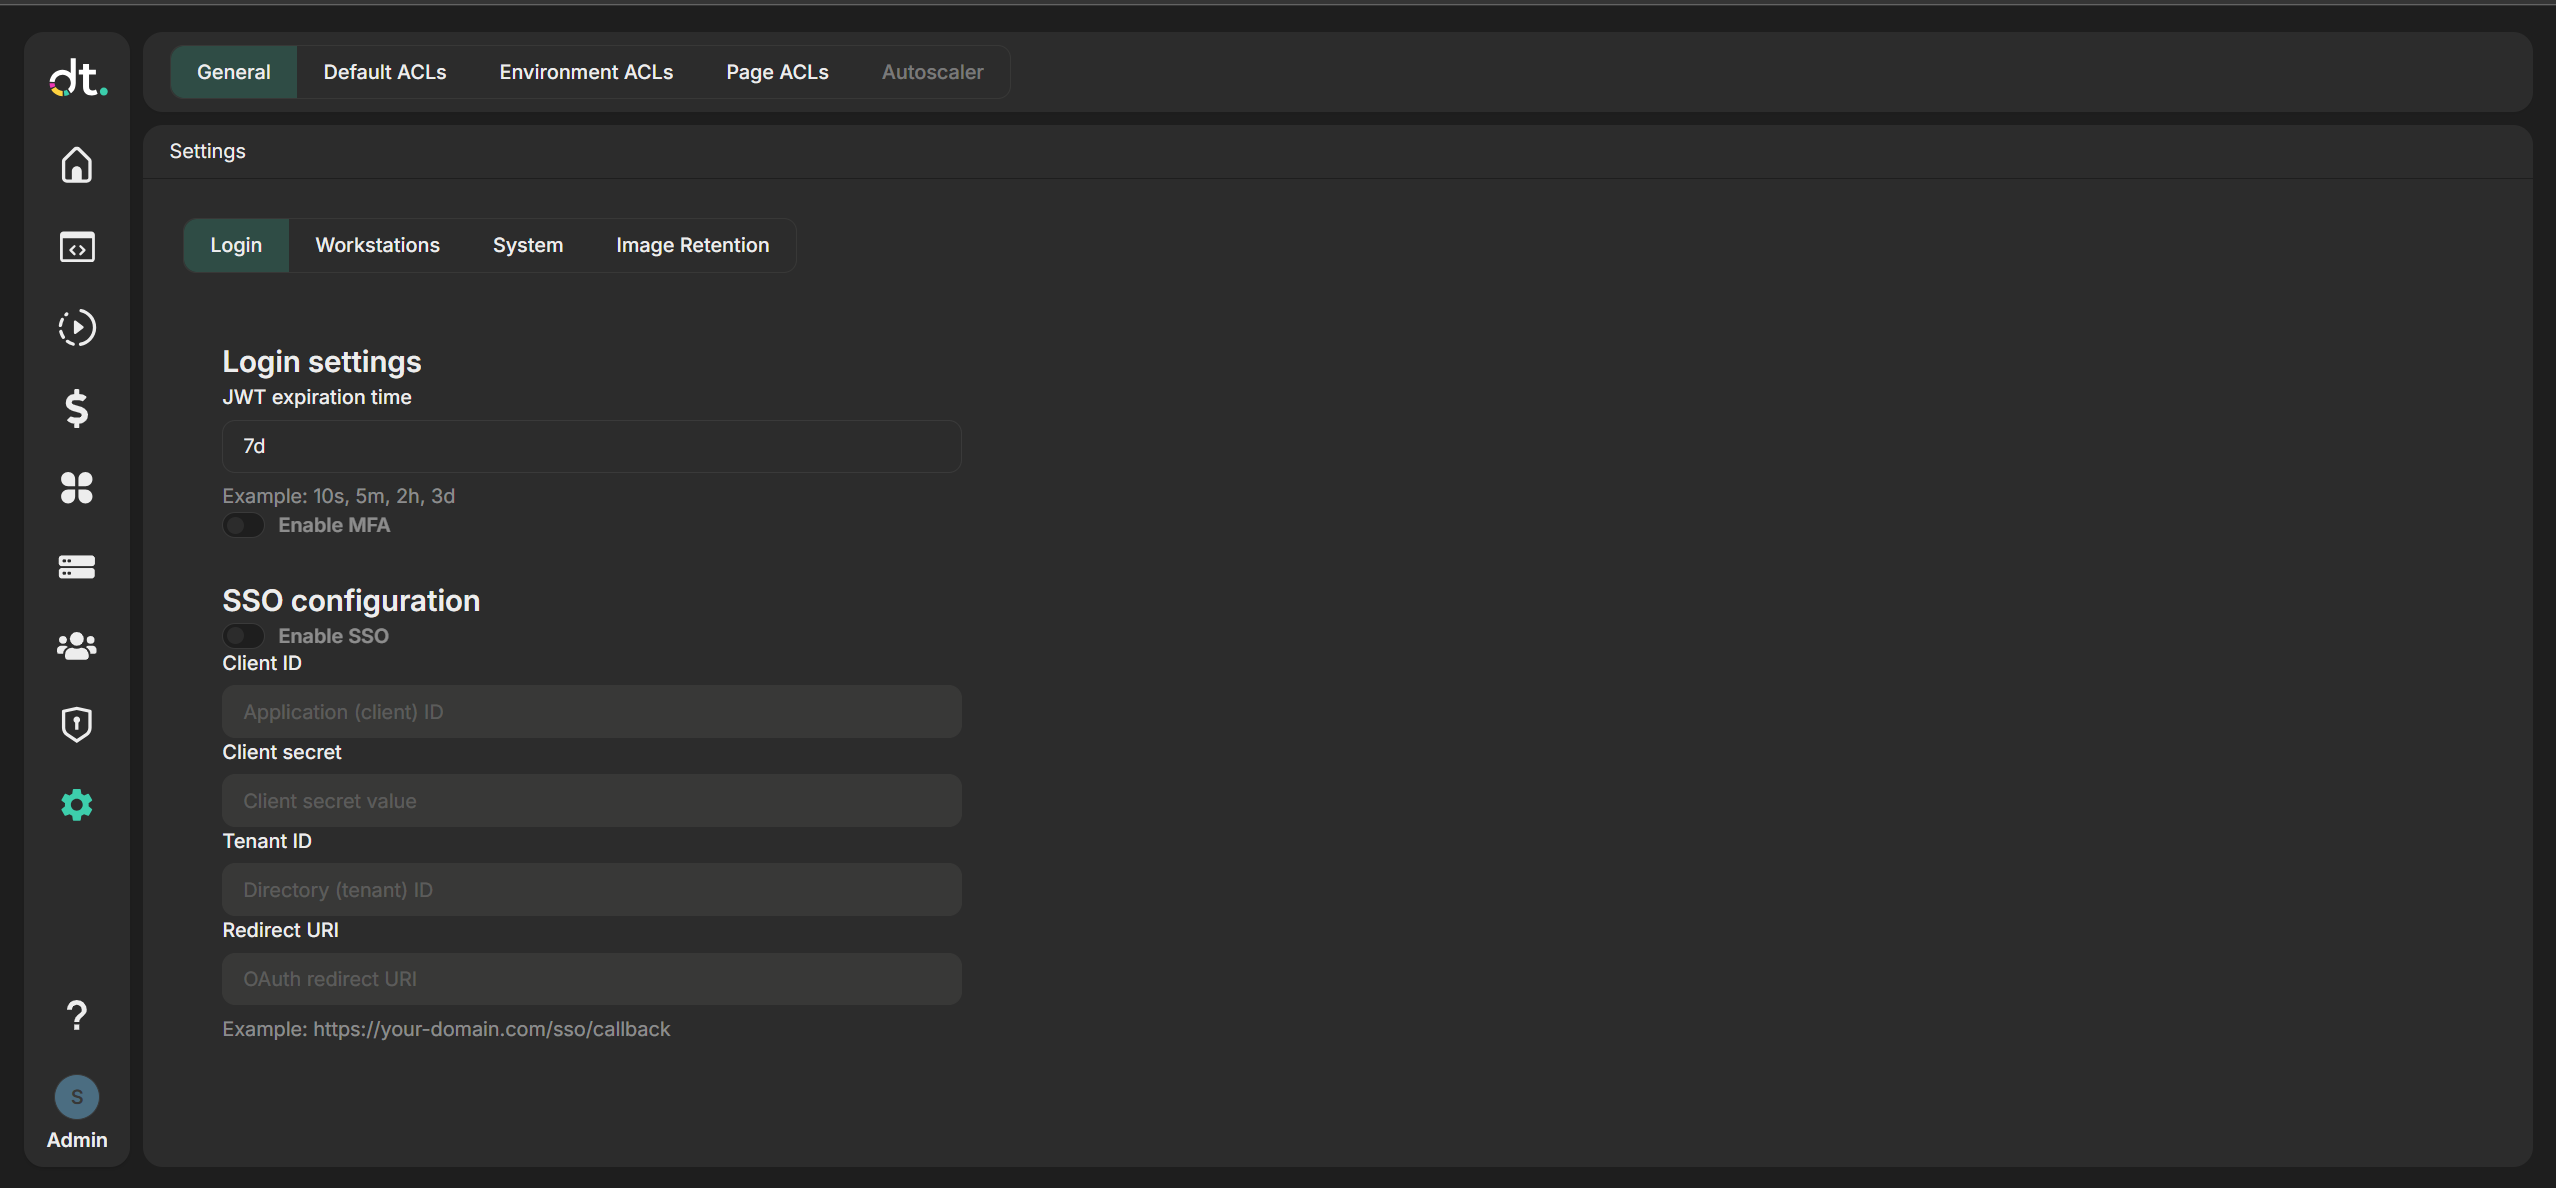
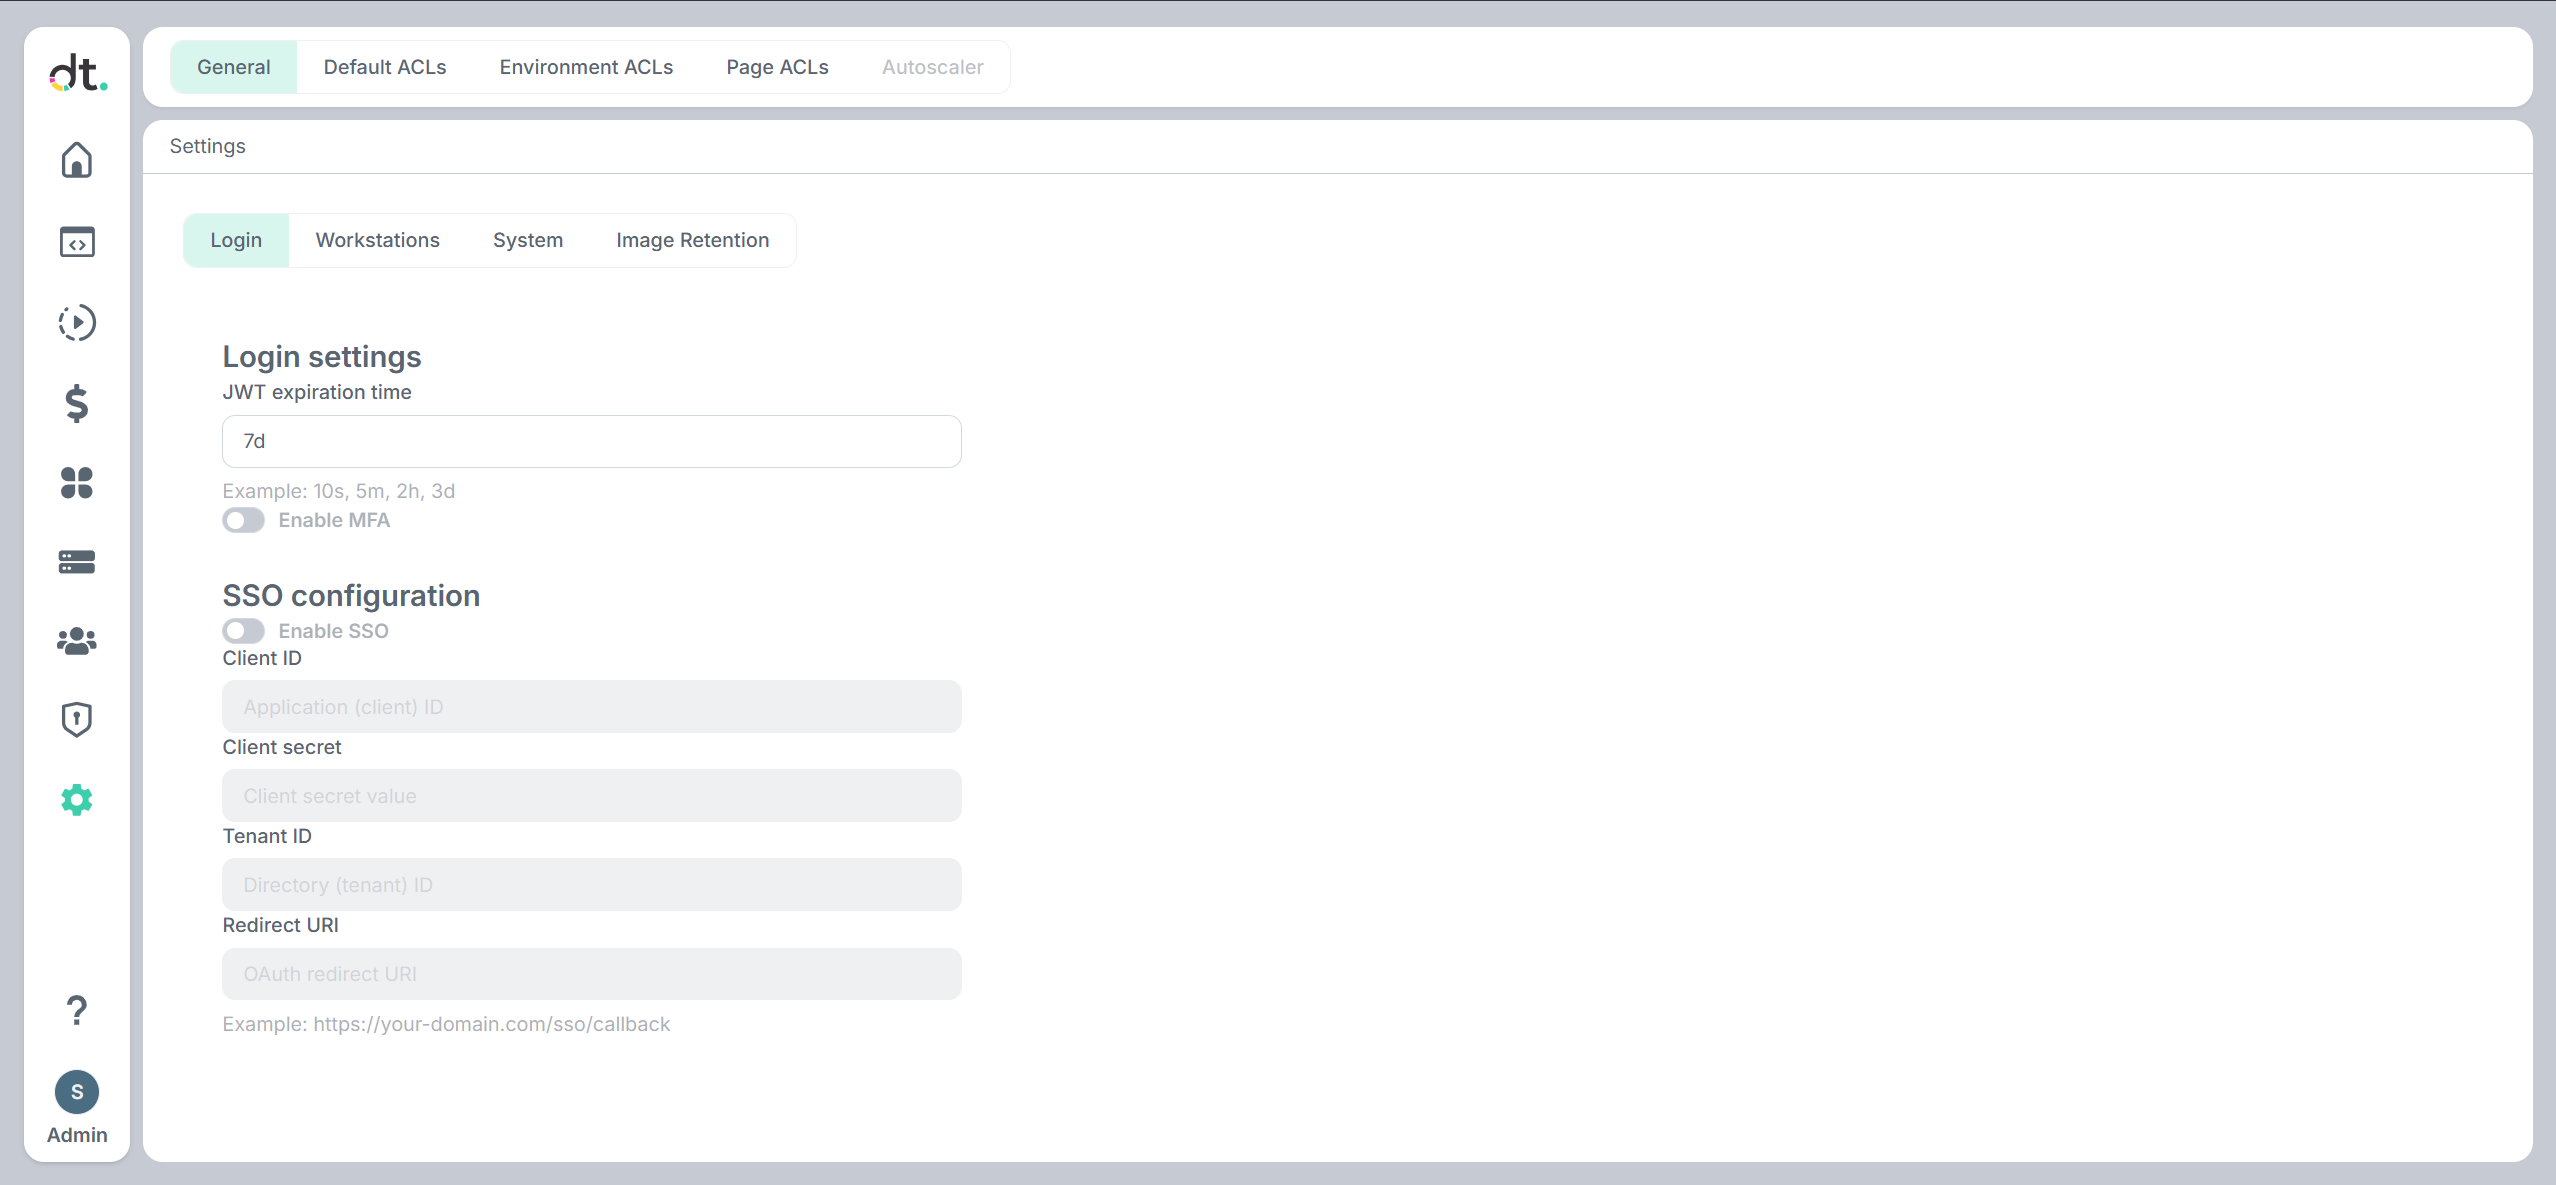
Some tabs have sub-tabs for more specific configuration.
General
The General tab has three sub-tabs: Login, Workstations, and System.
Login settings
The Login sub-tab controls how users authenticate and how long sessions last.
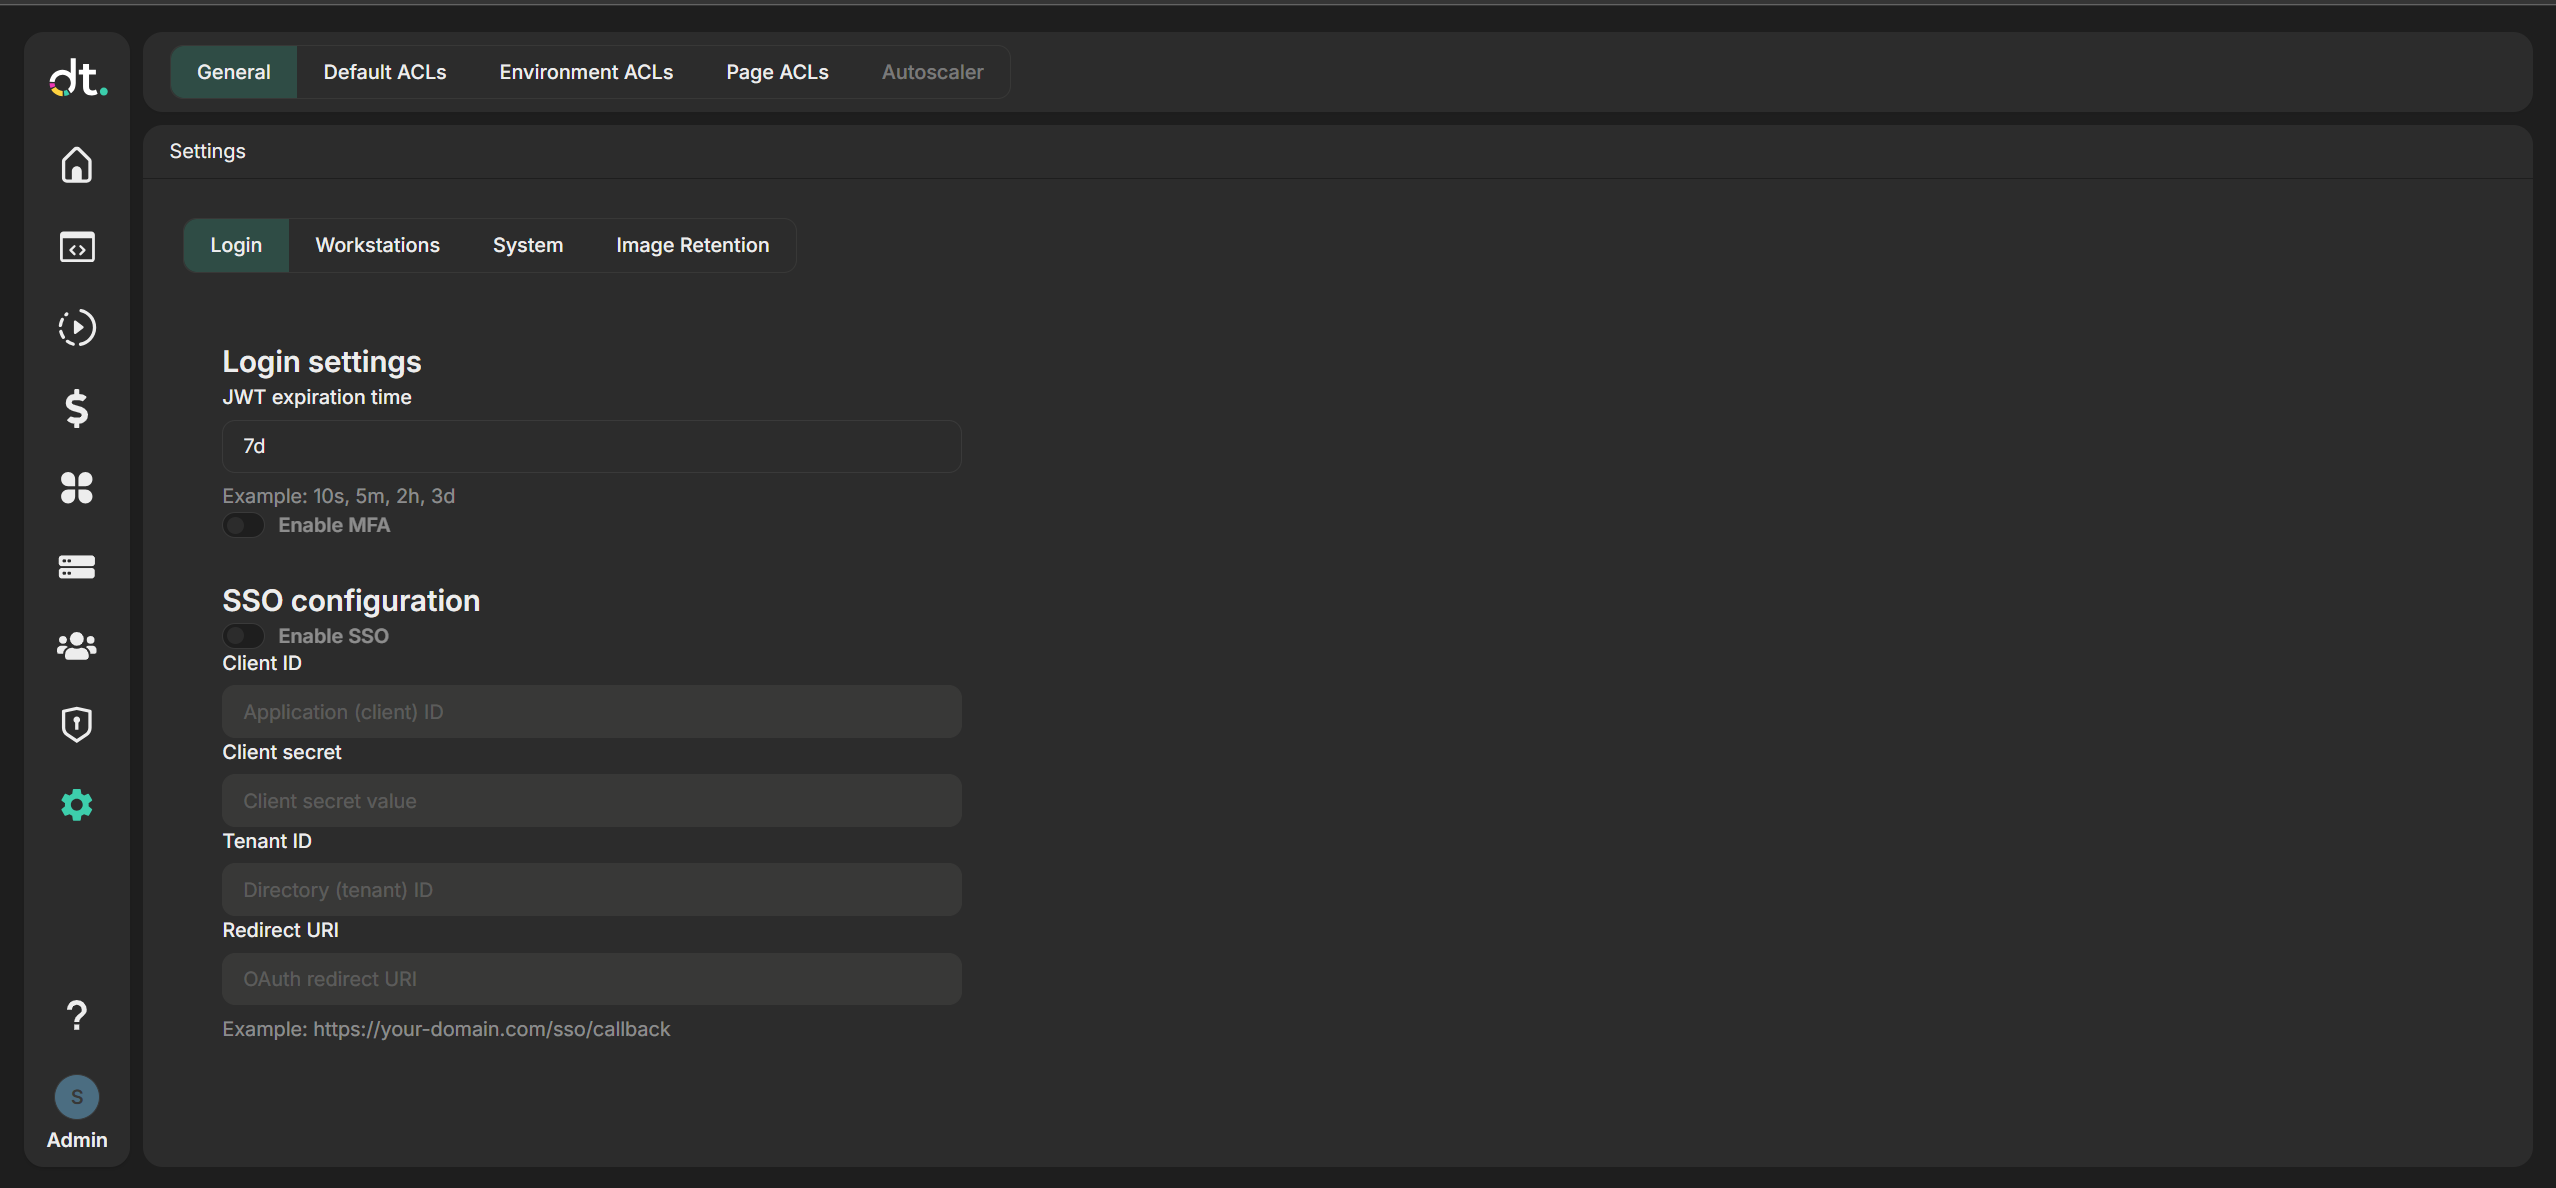
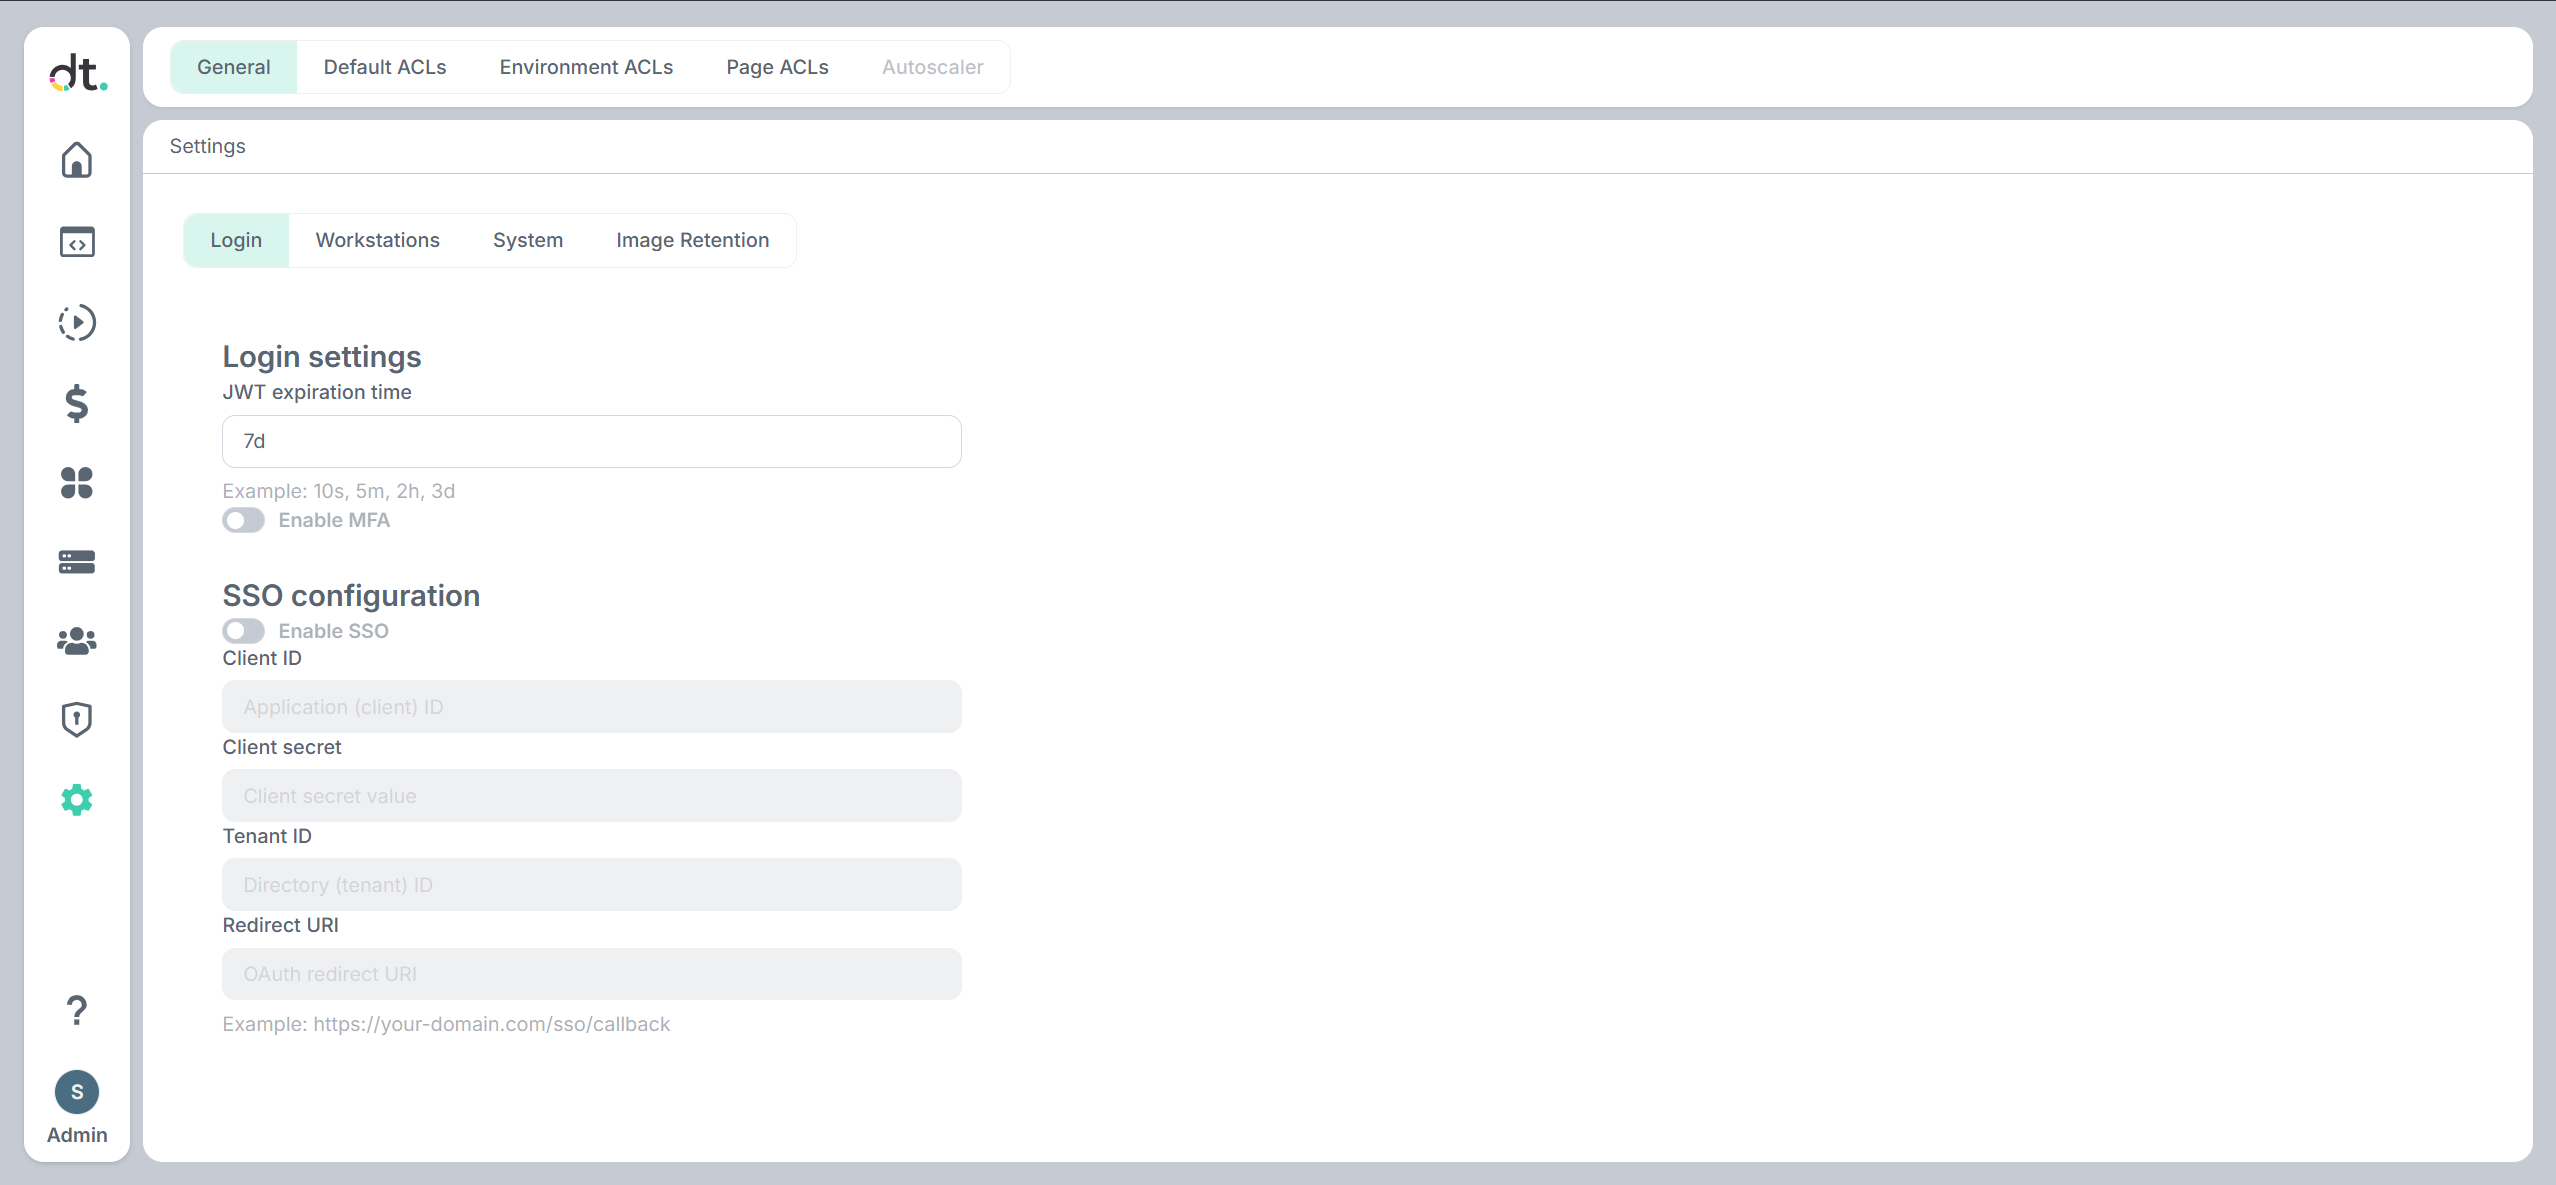
- JWT expiration time Set how long a signed-in session stays valid. Use a duration string, for example:
10s— 10 seconds5m— 5 minutes2h— 2 hours3d— 3 days
Enter the value in the JWT expiration time field. Shorter values improve security but require more frequent logins.
-
Enable MFA Turn Enable MFA on to require multi-factor authentication for user logins. When enabled, users must complete a second factor (e.g. TOTP) in addition to their password.
-
SSO setup details For provider support, required fields, and step-by-step setup instructions, see SSO settings below.
-
Save or discard Click Save to apply changes. If you edited fields but don't want to keep them, click Discard to reset the form to the last saved state.
Changes take effect for new logins and token refreshes; existing sessions may continue until their tokens expire.
SSO settings
Use this checklist to configure and validate SSO end to end.
Current provider support
Datatailr supports Microsoft Entra ID, Auth0, Okta, and Duo in the GUI and CLI. Only one SSO provider can be active at a time.
-
Prepare the identity provider Create the application in your identity provider and collect the values shown in the GUI for that provider. Provider-specific setup is listed under Enable SSO using CLI (optional) below.
-
Configure SSO in Datatailr GUI
- Open Settings -> General -> Login.
- Turn on Enable SSO.
- Choose SSO provider: Microsoft Entra ID, Auth0, Okta, or Duo.
-
Fill in only the fields shown for that provider:
Field Microsoft Entra ID Auth0 Okta Duo Client identifier Application (client) ID Client ID Client ID Client ID Secret Client secret Client Secret Client secret Client Secret Tenant / host Directory (tenant) ID Domain Okta domain Issuer host Authorization server — — Authorization server ID (optional) — Callback Redirect URI Allowed Callback URL Sign-in redirect URI Sign-In Redirect URL -
For Okta, leave Authorization server ID empty to use the Org Authorization Server, or set it (often
default) for a Custom Authorization Server. - Click Save.
Datatailr sends a state parameter on the authorize request and checks it on callback.
- Verify login flow
- Open the login page in a new/private browser session.
- Confirm the SSO button is visible.
- Click SSO and complete sign-in with the configured provider.
-
Confirm you are redirected back to Datatailr and land on the application home page.
-
User provisioning behavior
- Datatailr maps SSO users by email address.
- If the identity provider includes
email_verifiedand it isfalse, login is rejected. - If no Datatailr user exists for the email, Datatailr creates a new user automatically during first successful SSO login.
Enable SSO using CLI (optional)
You can configure login settings via dt settings put. Put replaces the whole login object, so include JWT and MFA values you want to keep.
Microsoft Entra ID:
- Create (or reuse) an app registration in your Microsoft Entra ID tenant.
- Collect Application (client) ID, Directory (tenant) ID, and Client secret value.
- Add a redirect URI of
https://your-domain.com/sso/callback. - Apply the settings:
dt settings put login '{"jwt_expiration_time":"12h","mfa":"false","sso_enabled":"true","sso_provider":"microsoft","sso_client_id":"<client-id>","sso_client_secret":"<client-secret>","sso_tenant_id":"<tenant-id>","sso_redirect_uri":"https://your-domain.com/sso/callback"}'
Auth0:
- In Auth0, create a Regular Web Application.
- Enable the Authorization Code grant type.
- Add an Allowed Callback URL of
https://your-domain.com/sso/callback. - Collect Domain, Client ID, and Client Secret.
- Apply the settings:
dt settings put login '{"jwt_expiration_time":"12h","mfa":"false","sso_enabled":"true","sso_provider":"auth0","sso_client_id":"<client-id>","sso_client_secret":"<client-secret>","sso_domain":"<tenant>.auth0.com","sso_redirect_uri":"https://your-domain.com/sso/callback"}'
sso_domain can be the Auth0 Domain field (tenant.auth0.com or tenant.us.auth0.com) or a custom domain. A leading https:// and trailing / are stripped if present.
Okta:
- In Okta, create a Web application.
- Enable the Authorization Code grant type.
- Add a Sign-in redirect URI of
https://your-domain.com/sso/callback. - Collect Okta domain, Client ID, and Client Secret.
- Choose an authorization server:
- Org Authorization Server: omit
sso_authorization_server_id(or leave it empty). Datatailr calls/oauth2/v1/authorize,/oauth2/v1/token, and/oauth2/v1/userinfo. - Custom Authorization Server: set
sso_authorization_server_idto the server id (oftendefault, or anaus...id). Assign the application to that server and include theopenid,profile, andemailscopes. Datatailr calls/oauth2/{id}/v1/authorize,/oauth2/{id}/v1/token, and/oauth2/{id}/v1/userinfo. - Apply the settings.
Org Authorization Server:
dt settings put login '{"jwt_expiration_time":"12h","mfa":"false","sso_enabled":"true","sso_provider":"okta","sso_client_id":"<client-id>","sso_client_secret":"<client-secret>","sso_domain":"<org>.okta.com","sso_redirect_uri":"https://your-domain.com/sso/callback"}'
Custom Authorization Server:
dt settings put login '{"jwt_expiration_time":"12h","mfa":"false","sso_enabled":"true","sso_provider":"okta","sso_client_id":"<client-id>","sso_client_secret":"<client-secret>","sso_domain":"<org>.okta.com","sso_authorization_server_id":"default","sso_redirect_uri":"https://your-domain.com/sso/callback"}'
sso_domain can be the Okta org domain (org.okta.com, org.oktapreview.com, or an Okta custom domain). A leading https:// and trailing / are stripped if present.
Duo:
- In the Duo Admin Panel, open Applications → Application Catalog and add Generic OIDC Relying Party (SSO label). Do not use the OAuth 2.1 / OIDC catalog app; that product requires PKCE, which Datatailr does not send.
- Enable the Authorization Code grant type.
- Add a Sign-In Redirect URL of
https://your-domain.com/sso/callback. - Enable the
openid,profile, andemailscopes. - Collect Client ID, Client Secret, and the Issuer host from Metadata (
sso-<tenant>.sso.duosecurity.com). - Apply the settings:
dt settings put login '{"jwt_expiration_time":"12h","mfa":"false","sso_enabled":"true","sso_provider":"duo","sso_client_id":"<client-id>","sso_client_secret":"<client-secret>","sso_domain":"sso-<tenant>.sso.duosecurity.com","sso_redirect_uri":"https://your-domain.com/sso/callback"}'
sso_domain is the Duo SSO host from the Issuer URL (https://sso-<tenant>.sso.duosecurity.com/oidc/<client-id>). A leading https:// and trailing / are stripped if present. Datatailr calls /oidc/{client-id}/authorize, /oidc/{client-id}/token, and /oidc/{client-id}/userinfo.
Use dt settings get login to confirm the stored values. The login page button label follows sso_provider (for example Sign in with Auth0, Sign in with Okta, or Sign in with Duo).
Workstation settings
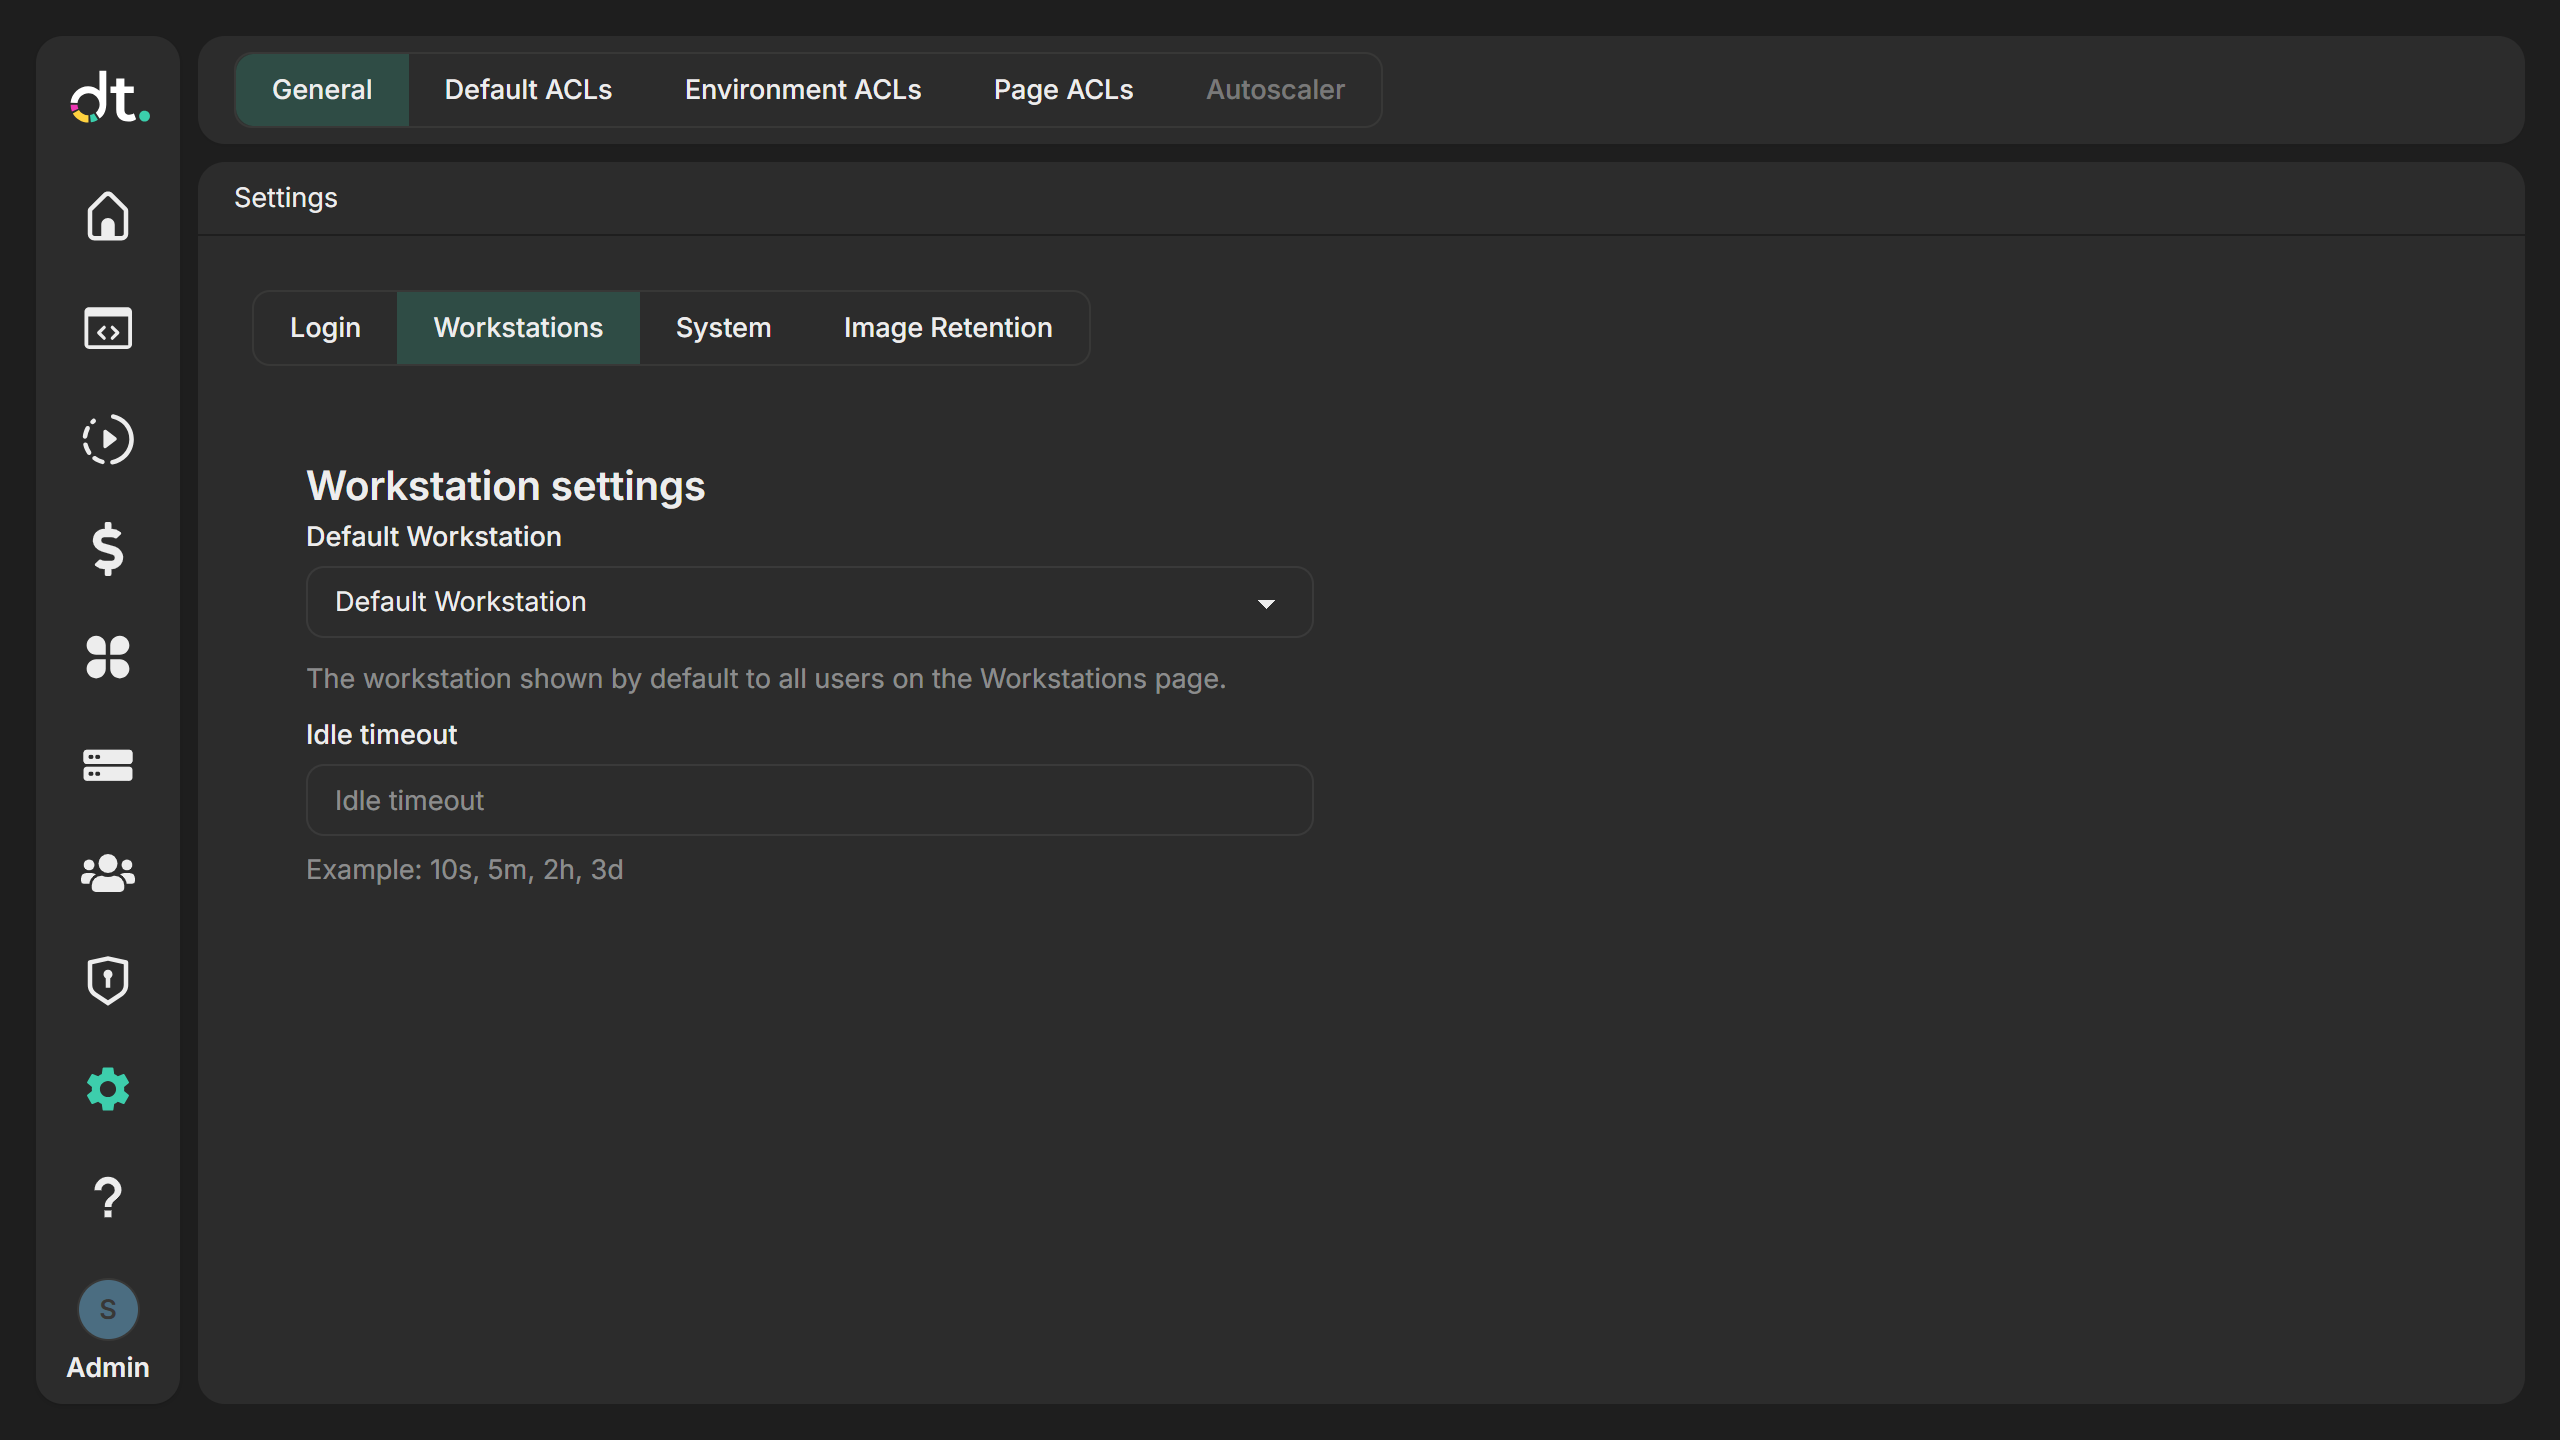
The Workstations sub-tab configures default workstation behavior for all users.
-
Default Workstation Choose which workstation is shown by default on the Workstations page. Select None (use first available) to let the system pick, or choose a specific workstation from the list.
-
Idle timeout Set how long a workstation IDE can be idle before it is considered inactive. Use a duration string (e.g.
10s,5m,2h,3d). Enter the value in the Idle timeout field. -
Save or discard Click Save to apply; click Discard to revert to the last saved state.
System settings
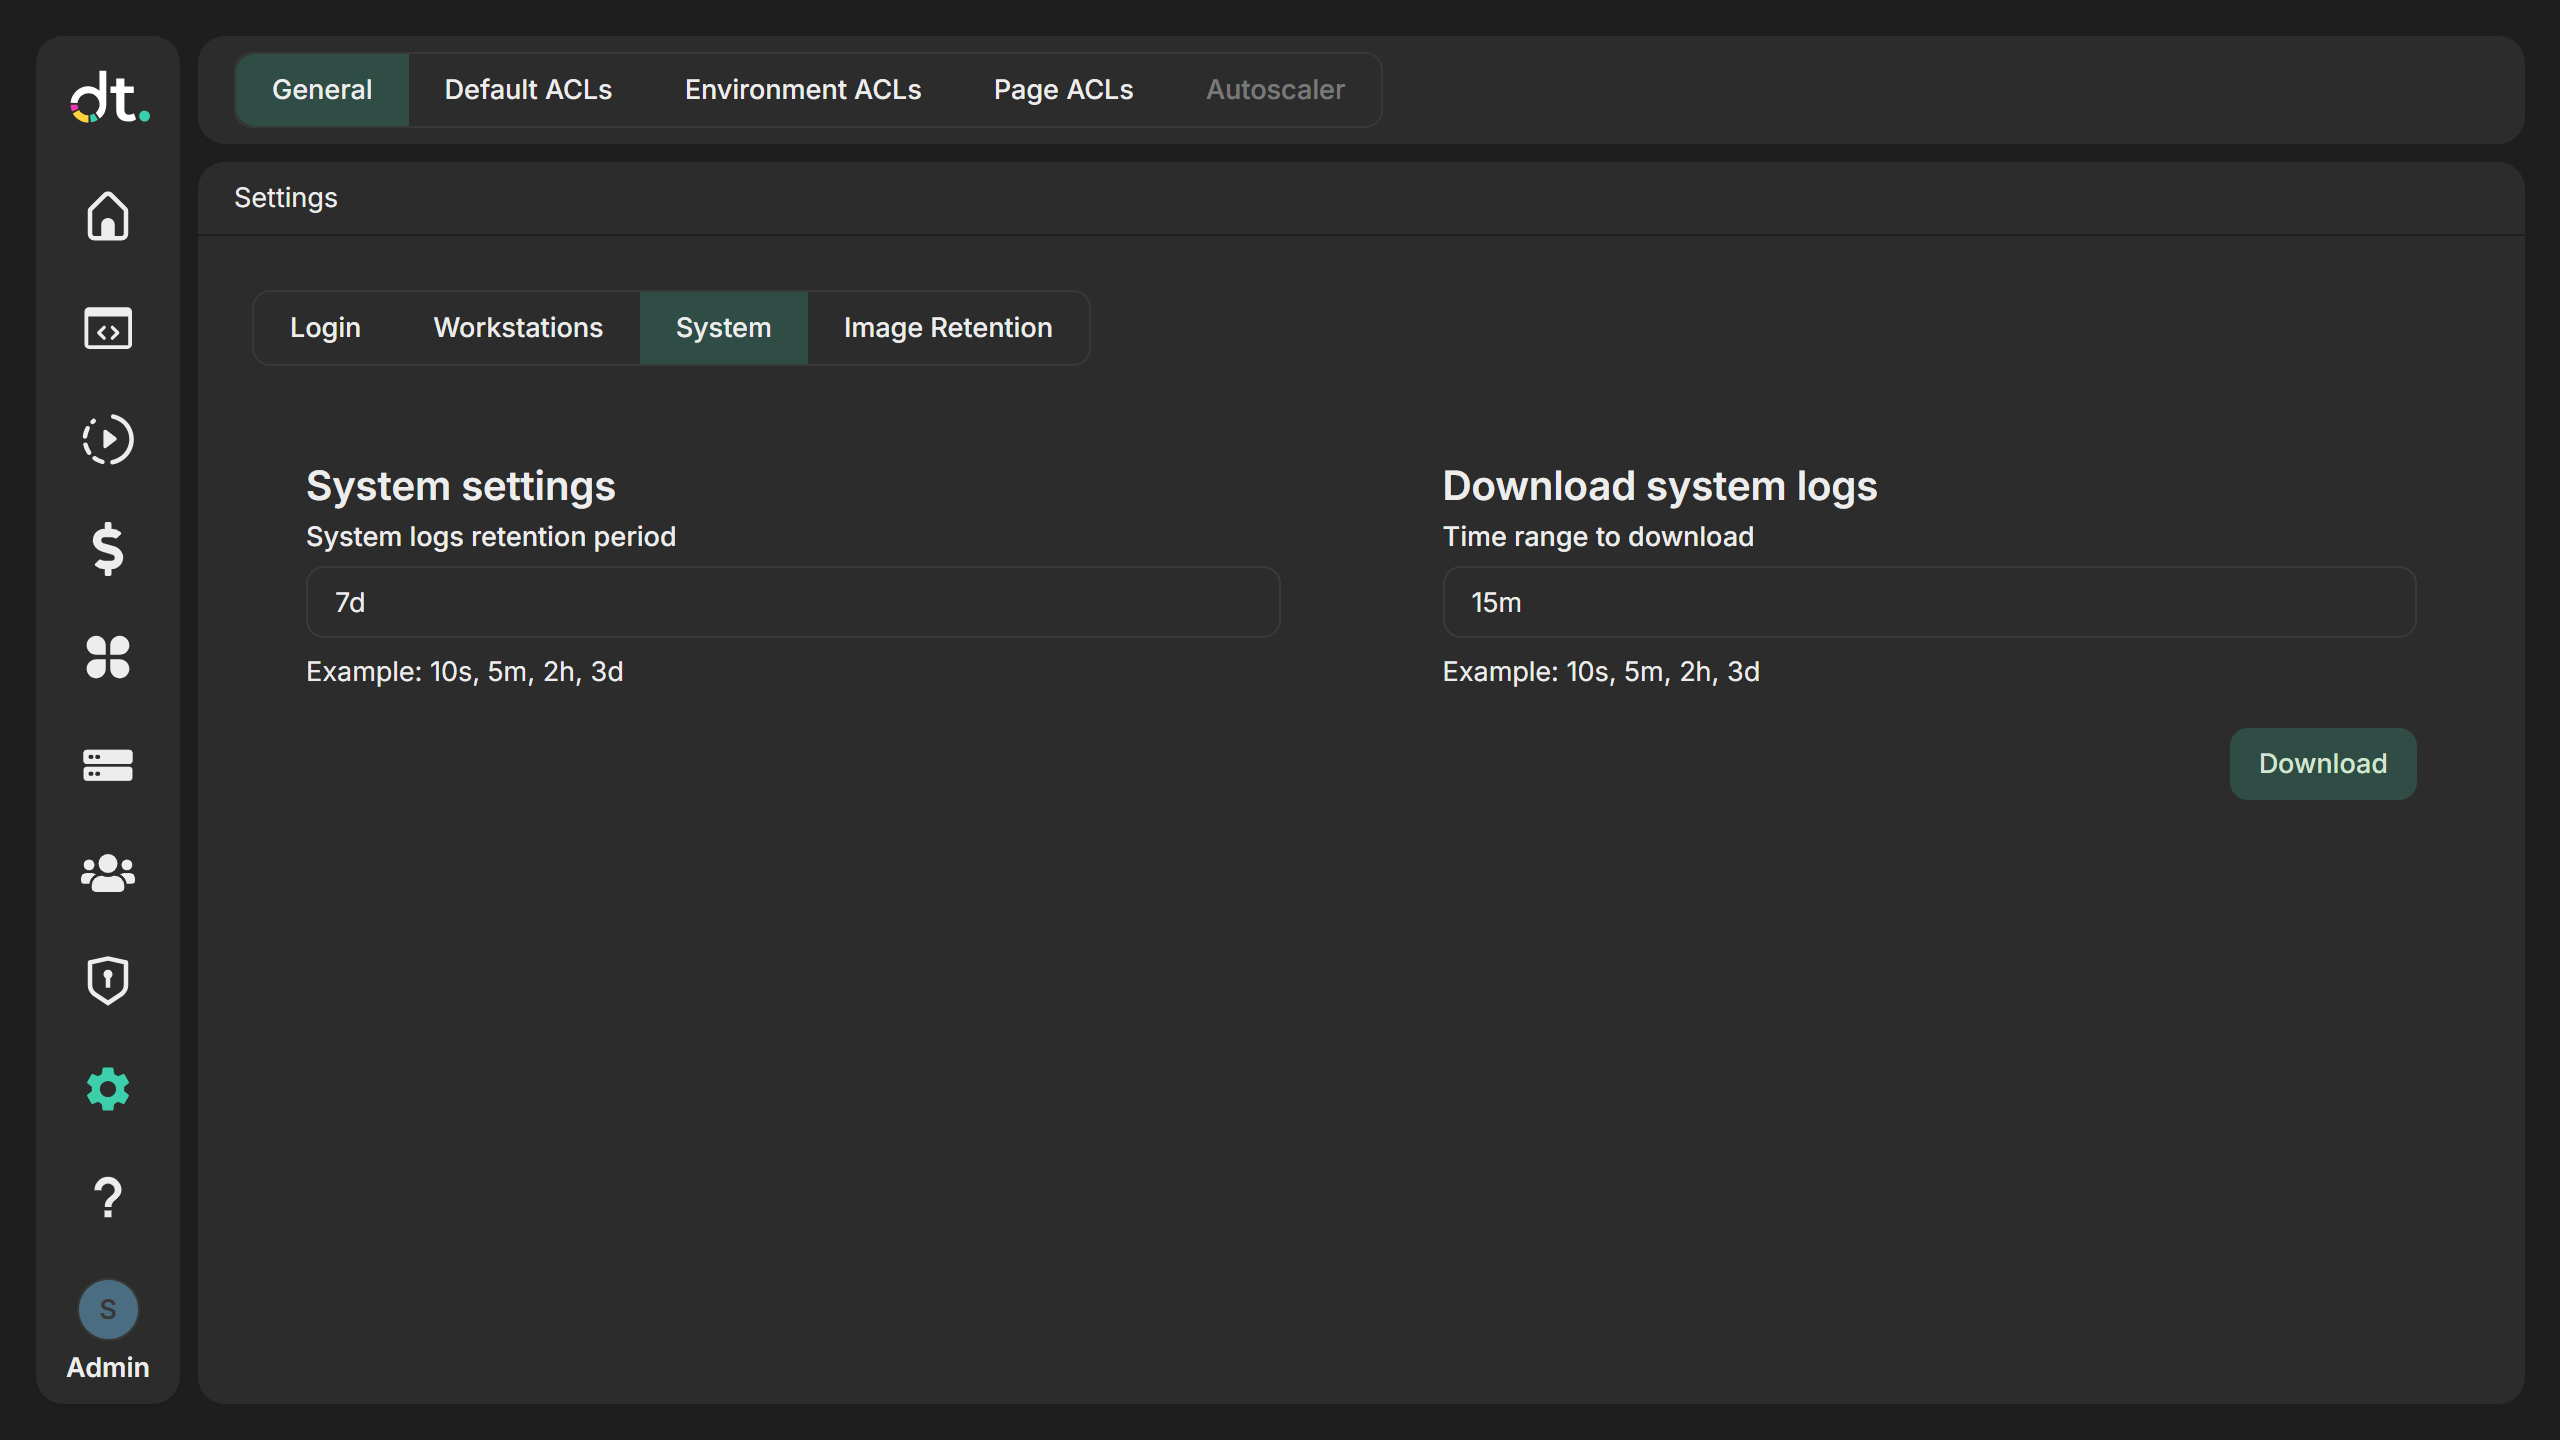
The System sub-tab controls system log retention and lets you download system logs.
-
System logs retention period Set how long system logs are retained in blob storage before they are purged. Use a duration string (e.g.
10s,5m,2h,3d). Enter the value in the System logs retention period field. -
Download system logs In the Download system logs card, set Time range to download to a duration (e.g.
15mfor the last 15 minutes). Click Download to download the logs for that range. -
Save or discard Changes to the retention period are applied when you click Save; use Discard to revert.
Image Retention
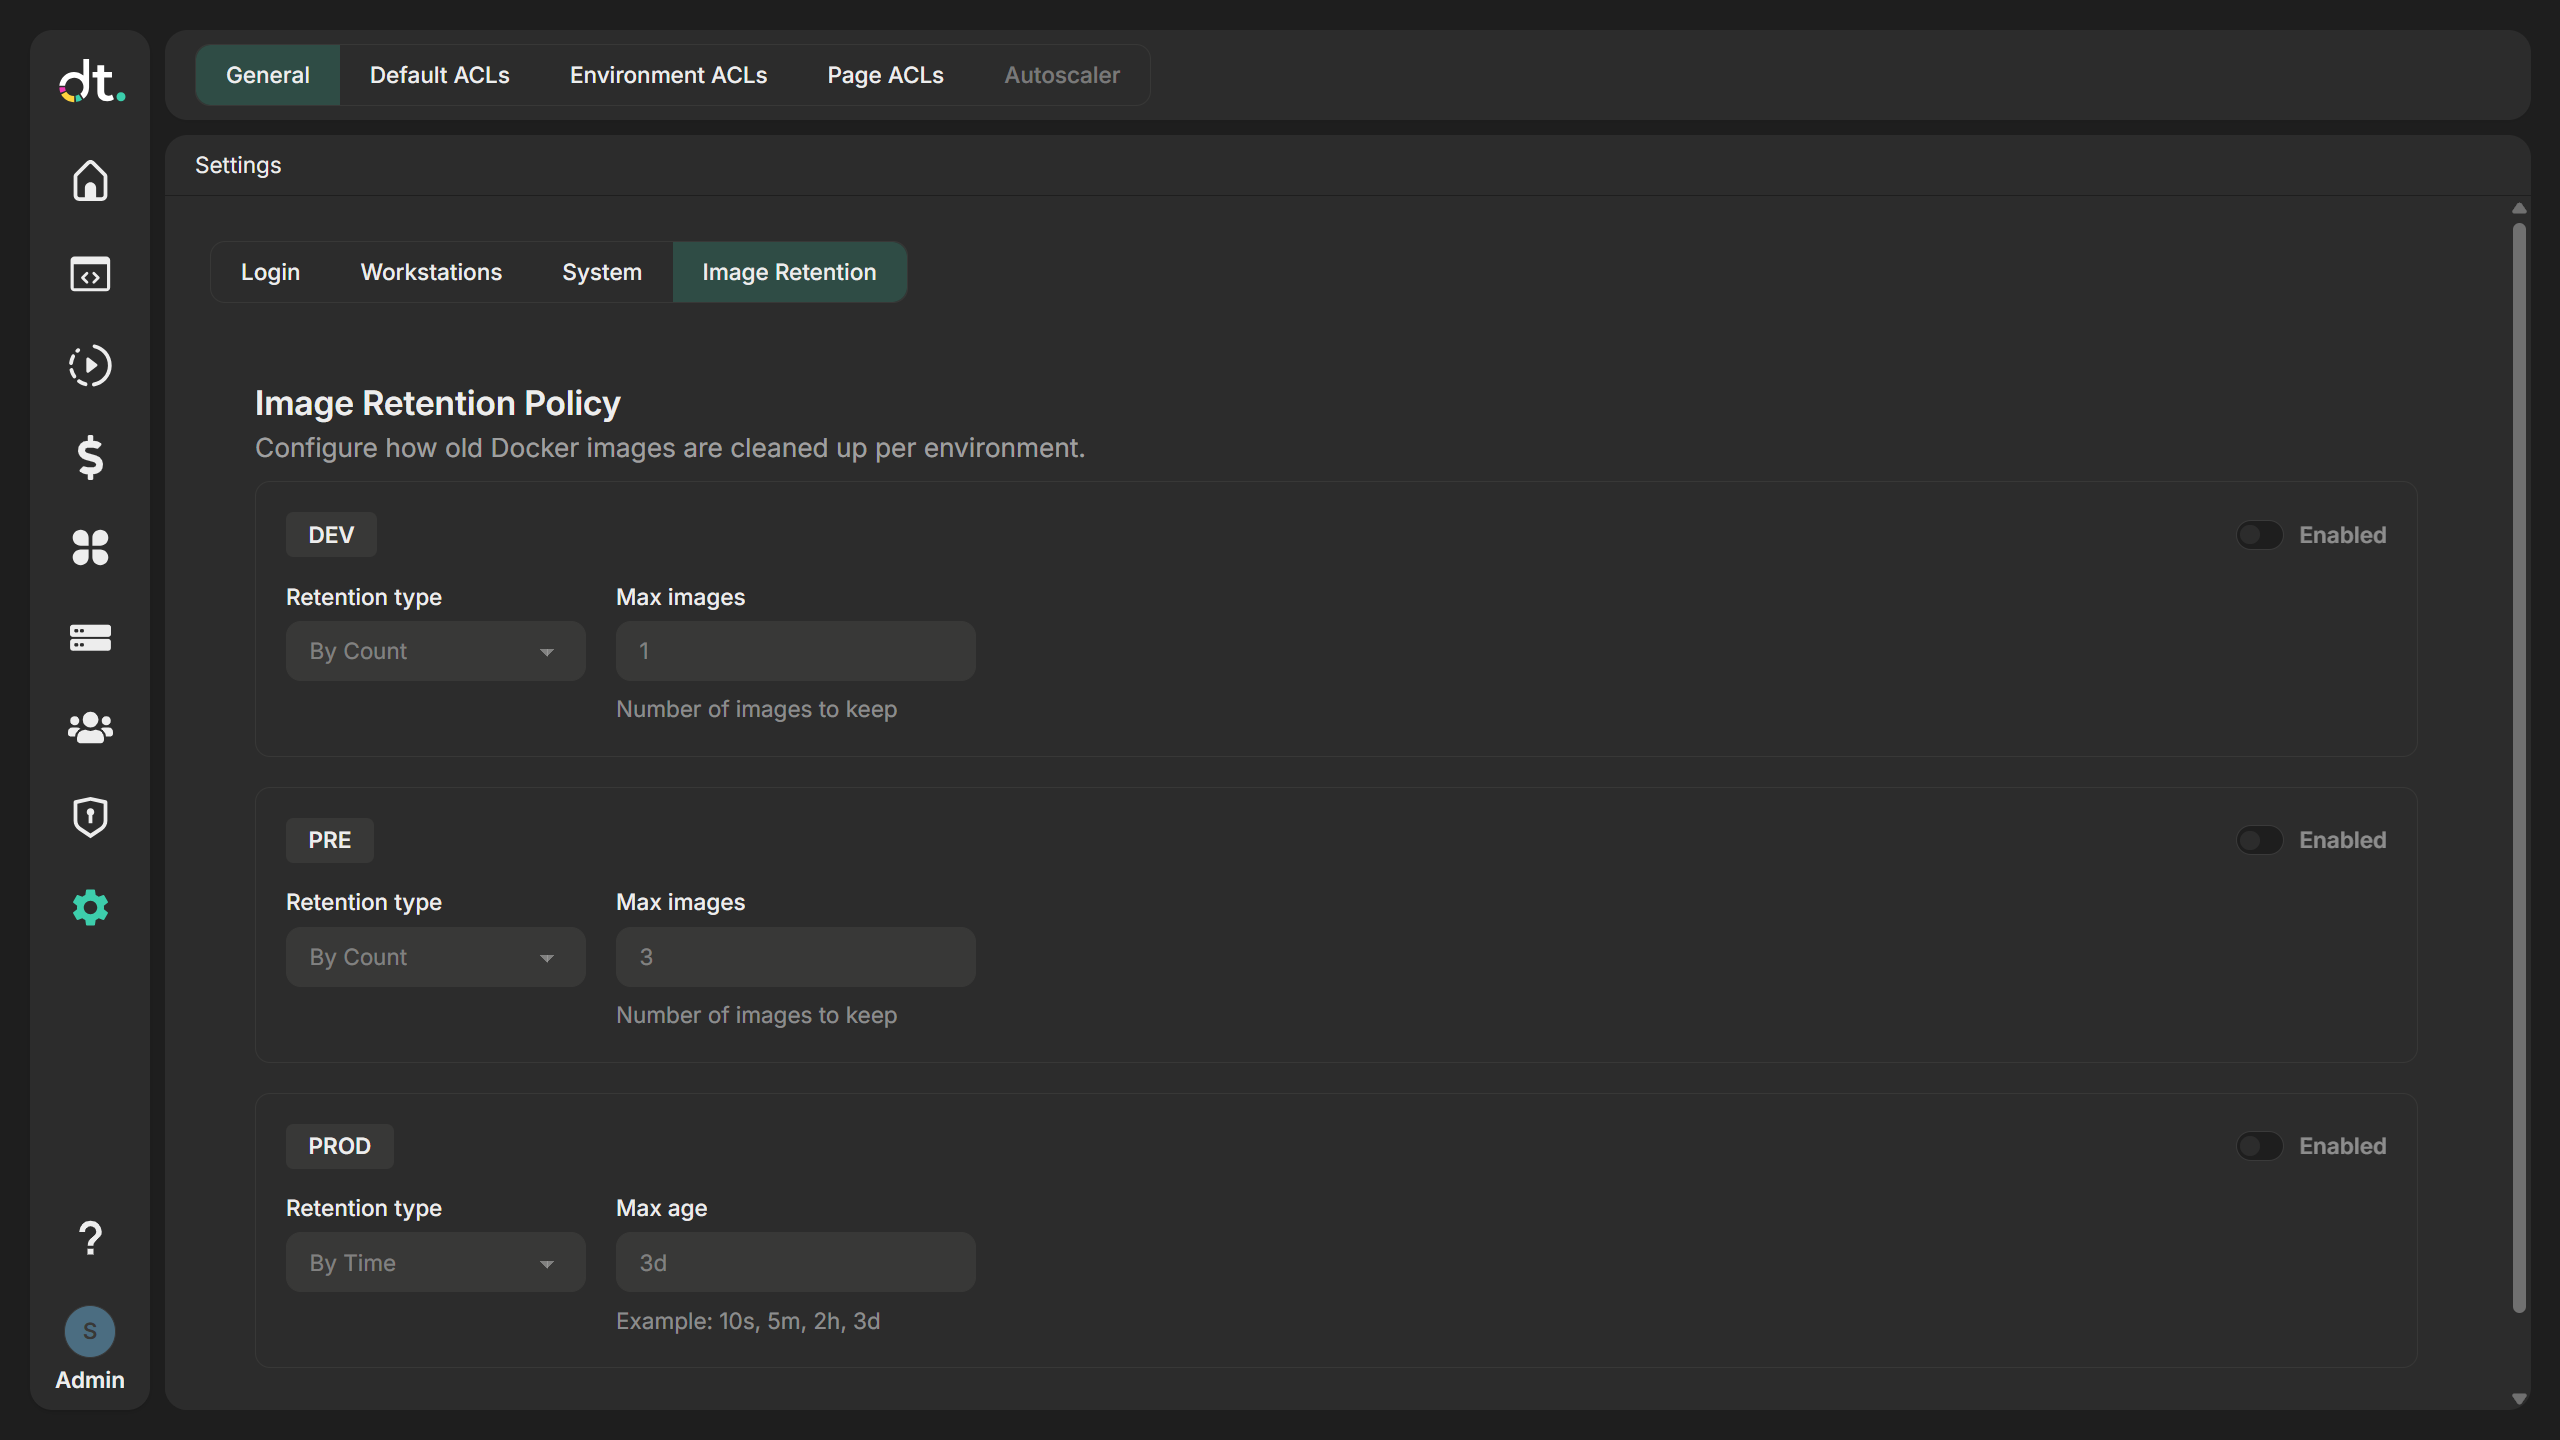
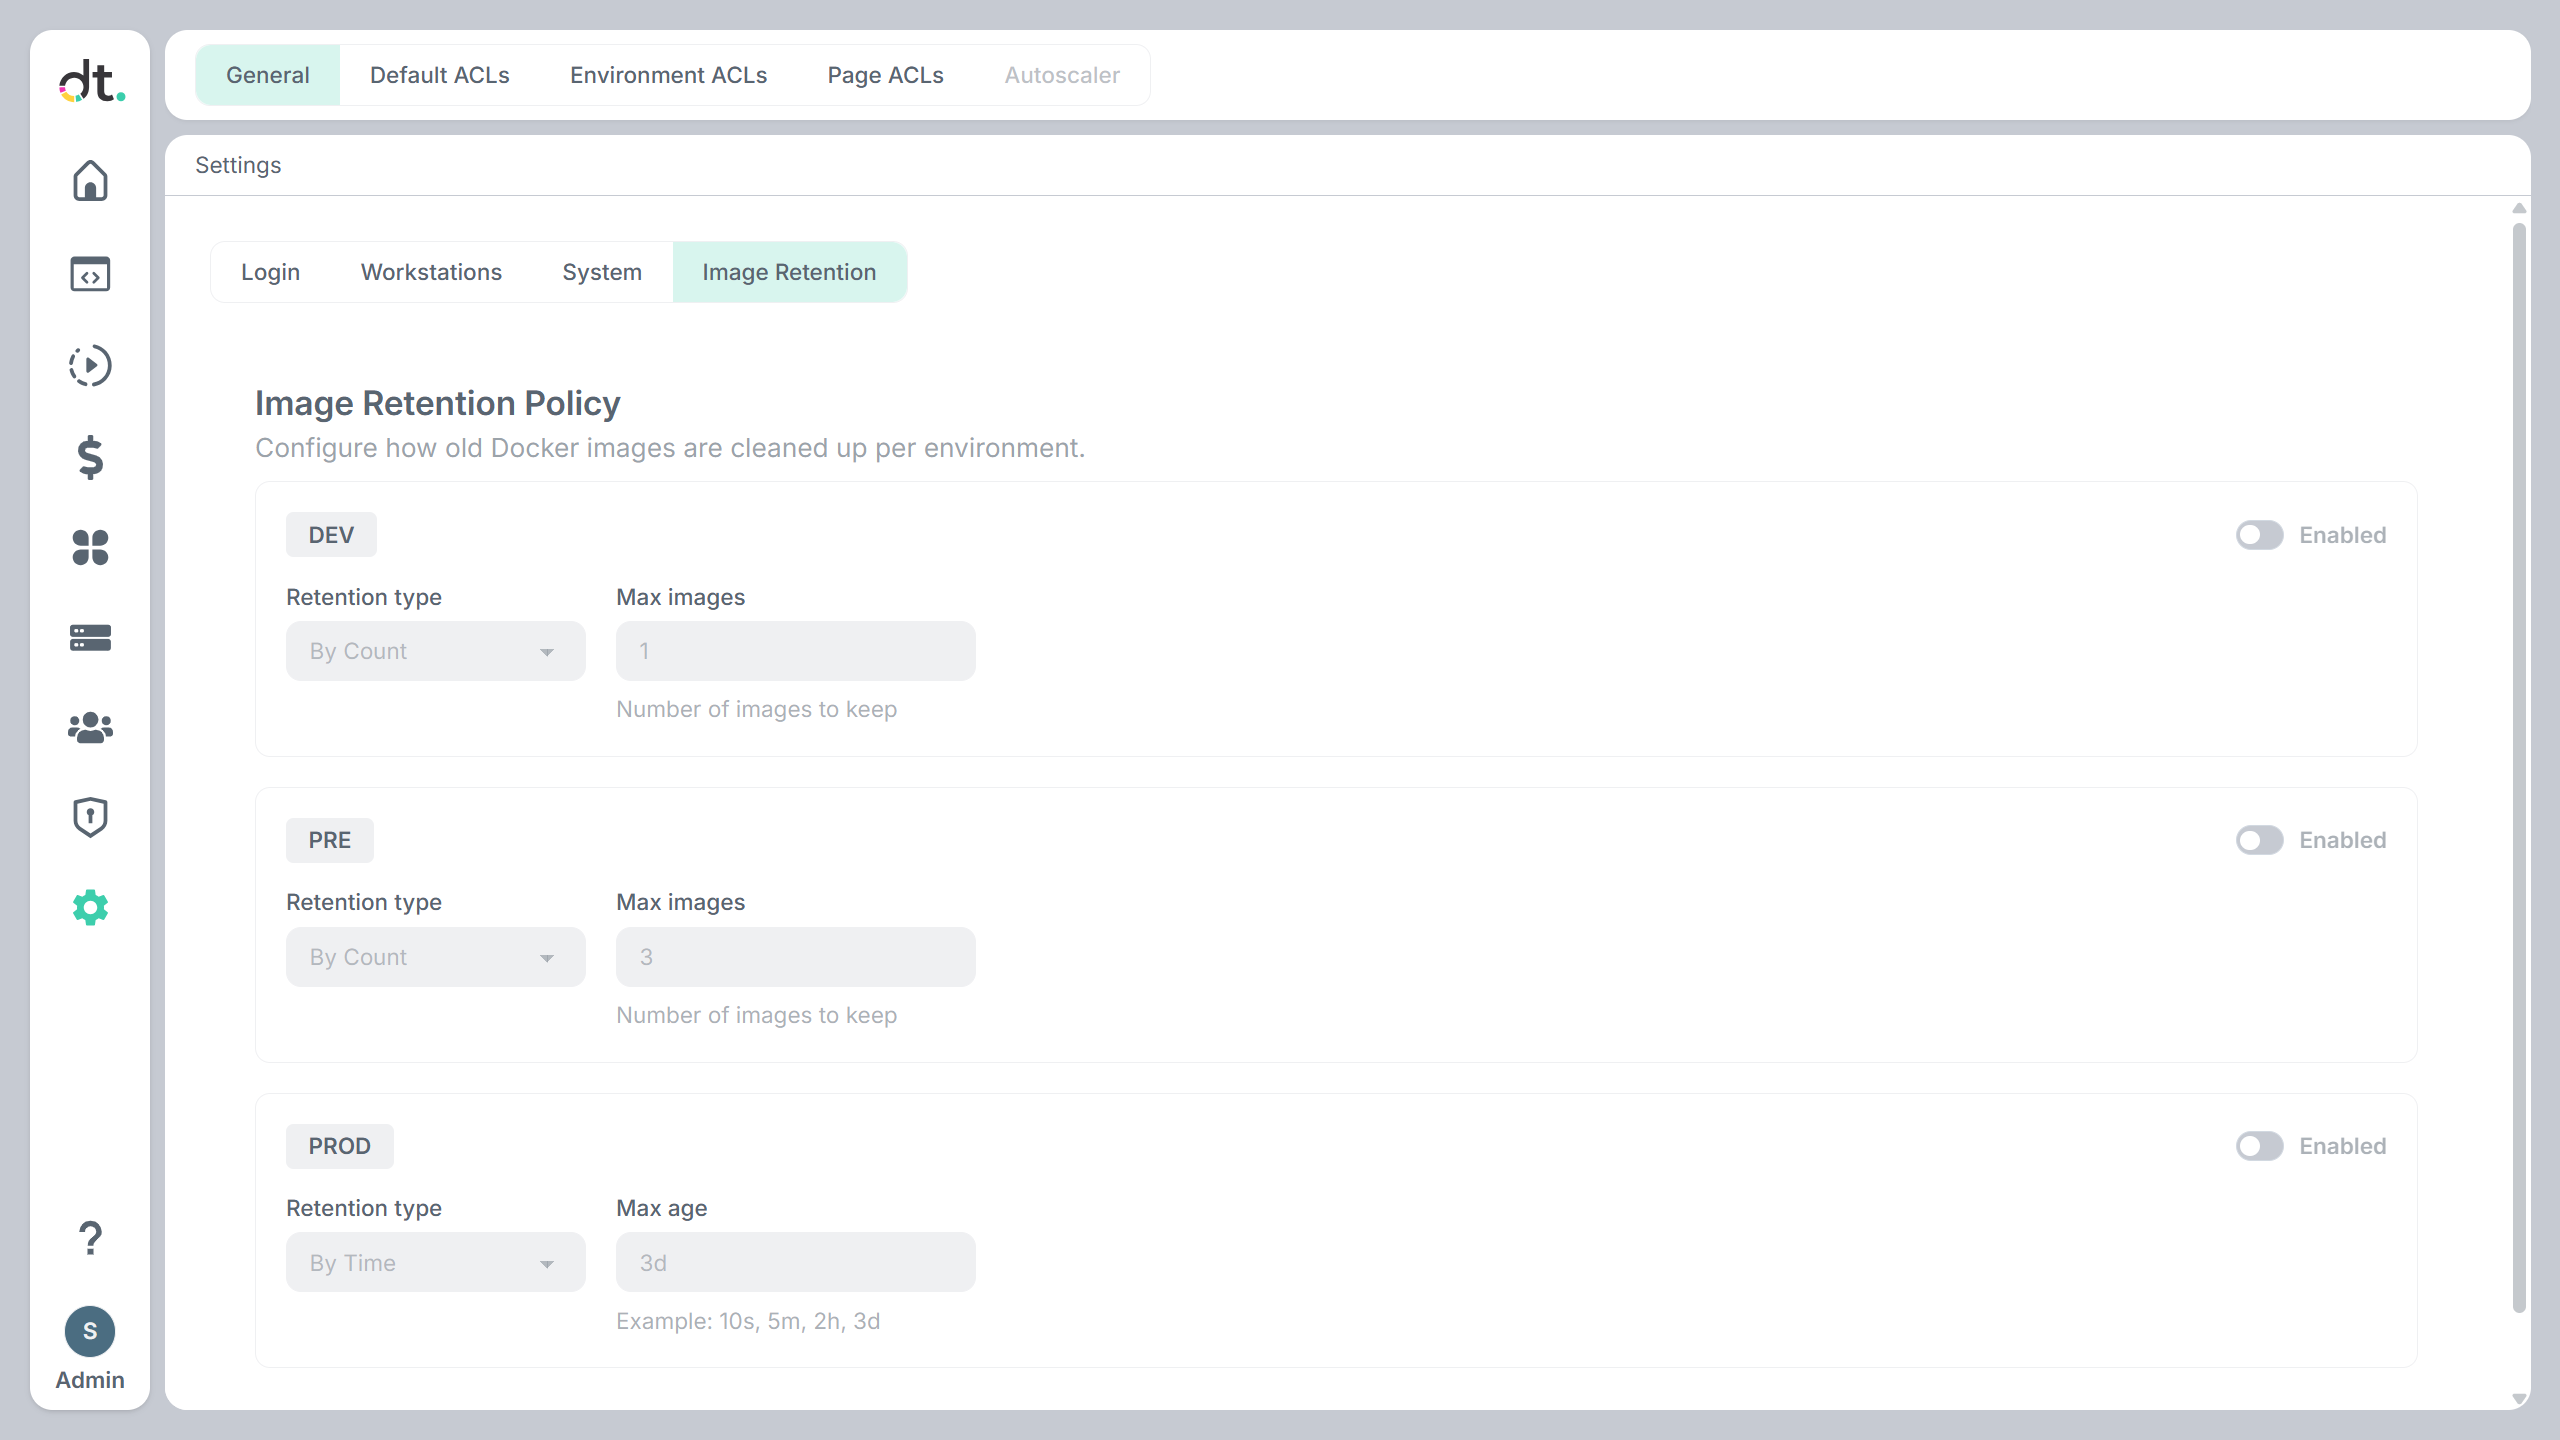
The Image retention policy card controls how long Docker images of older compute process versions are kept in the registry, per environment. Retention is disabled in every environment by default, so all images are kept.
-
Enabled Turn retention on or off for the environment.
-
Retention type
- By Count: keep the newest Max images images of each compute process.
-
By Time: delete images older than Max age (a duration such as
7d). The newest image is always kept. -
Save or discard Click Save to apply; click Discard to revert.
Users roll back a compute process by removing its current version, which needs the previous version's image. With By Count set to 1, older images are deleted, so rolling back is not possible in that environment. Keep at least 2 images where users need to roll back. See Rolling back to a previous version.
Only administrators can view or change these settings.
Default ACLs
The Default ACLs tab defines the default permissions applied when new KV (key-value) or Blob resources are created. Use the KV and Blob sub-tabs to configure each resource type. For an introduction to permissions, see Permissions.
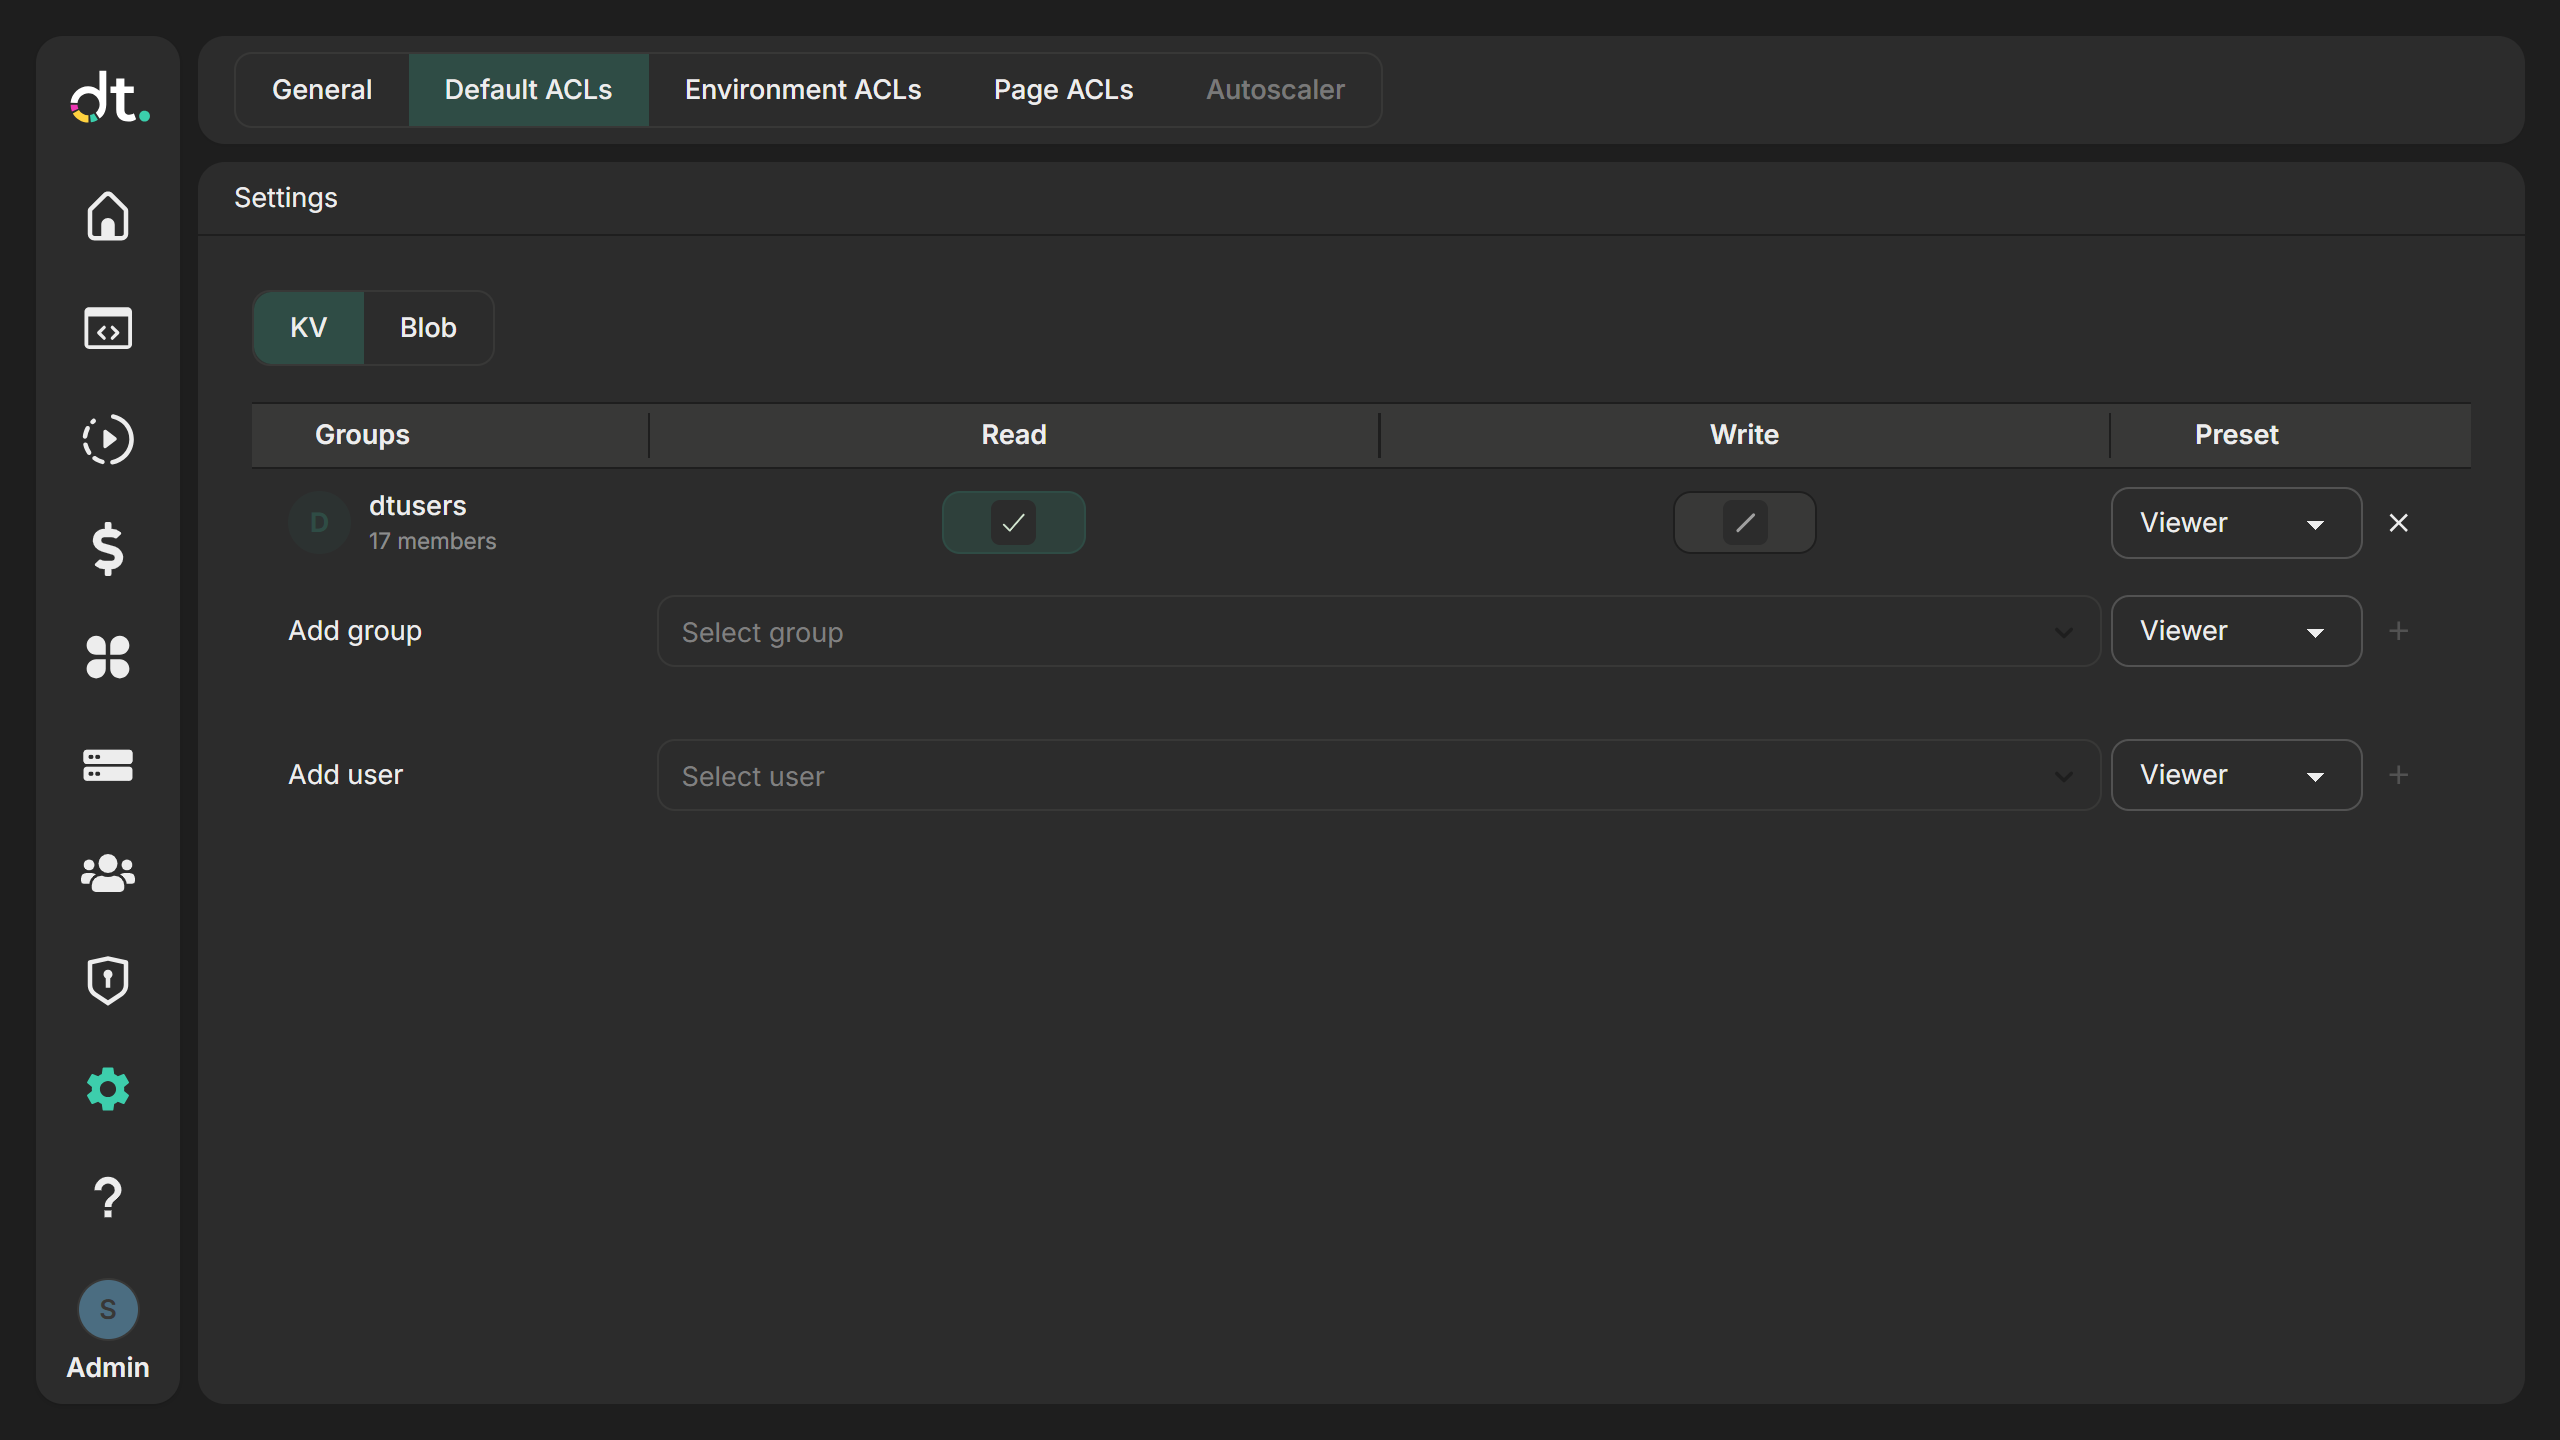
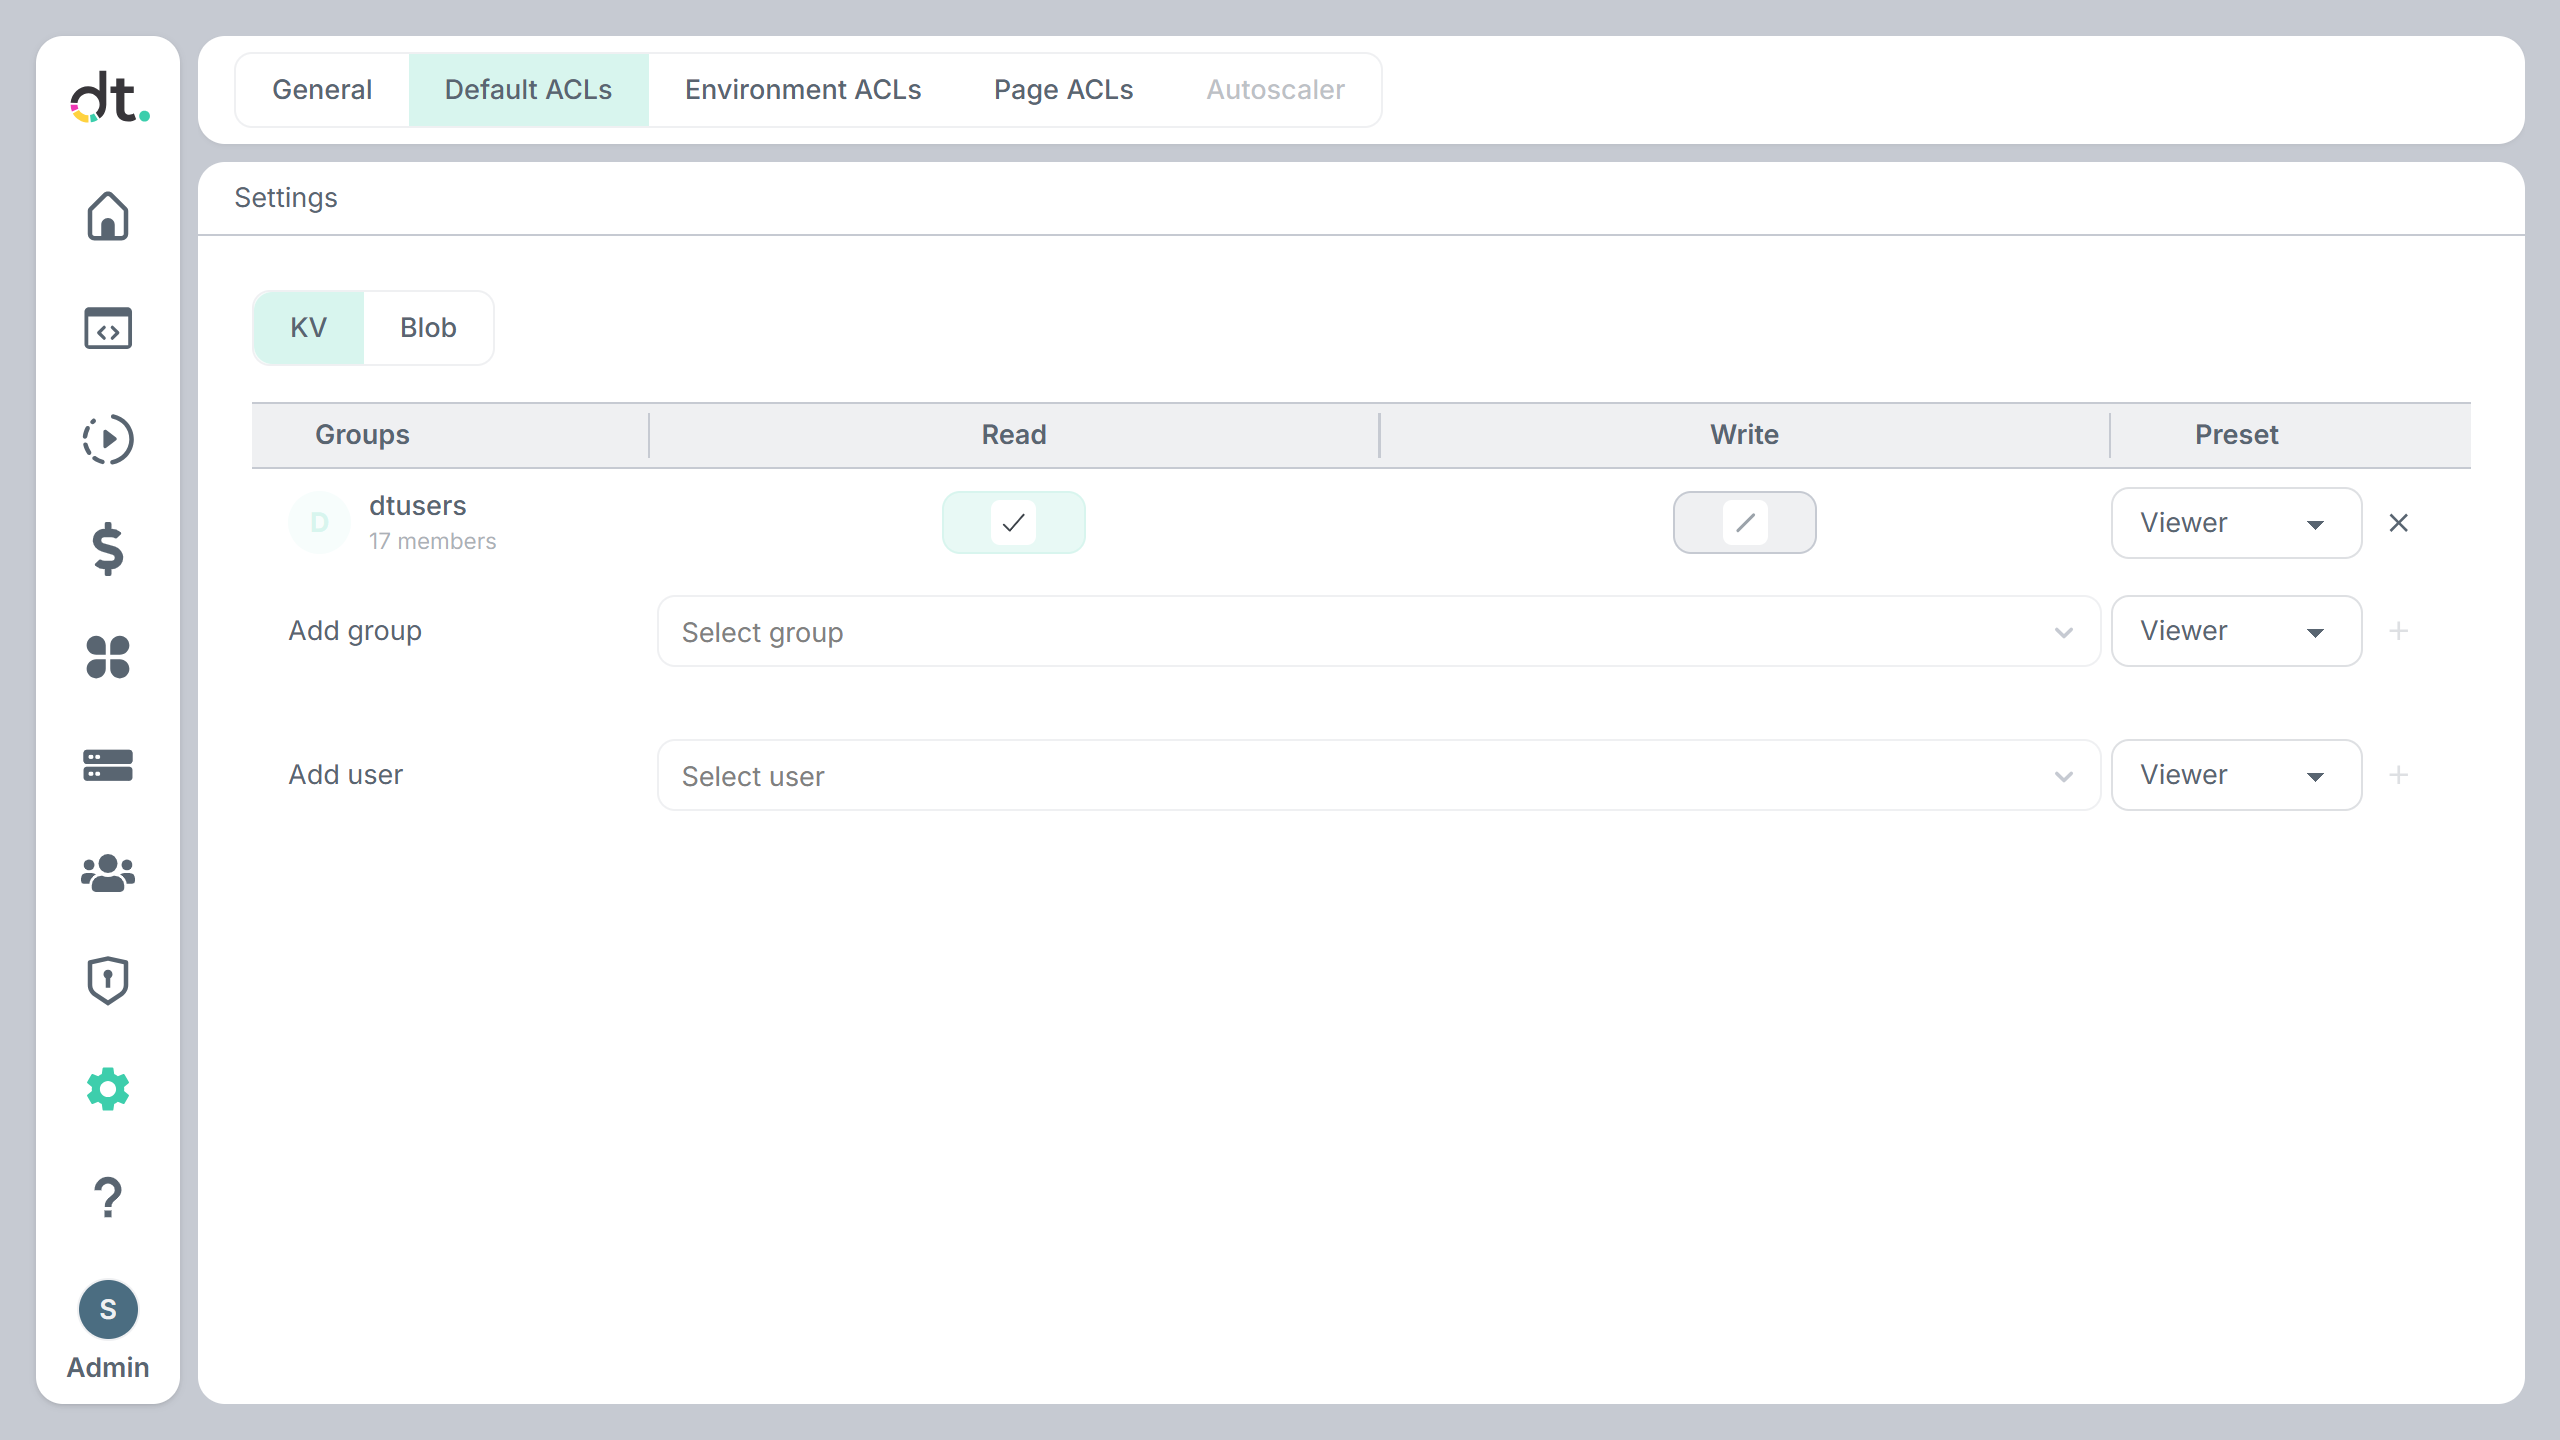
- Groups — Add or remove groups and assign Read and Write permissions. Use the Preset dropdown (e.g. Viewer, Full access) to apply a predefined set.
- Users — Add or remove users and assign Read and Write permissions with the same Preset options.
Changes apply to resources created after you save. Click Save to apply; Discard to revert.
Environment ACLs
The Environment ACLs tab configures who can access compute environments (Dev, Pre, Prod). Use the Dev, Pre, and Prod sub-tabs to set permissions per environment.
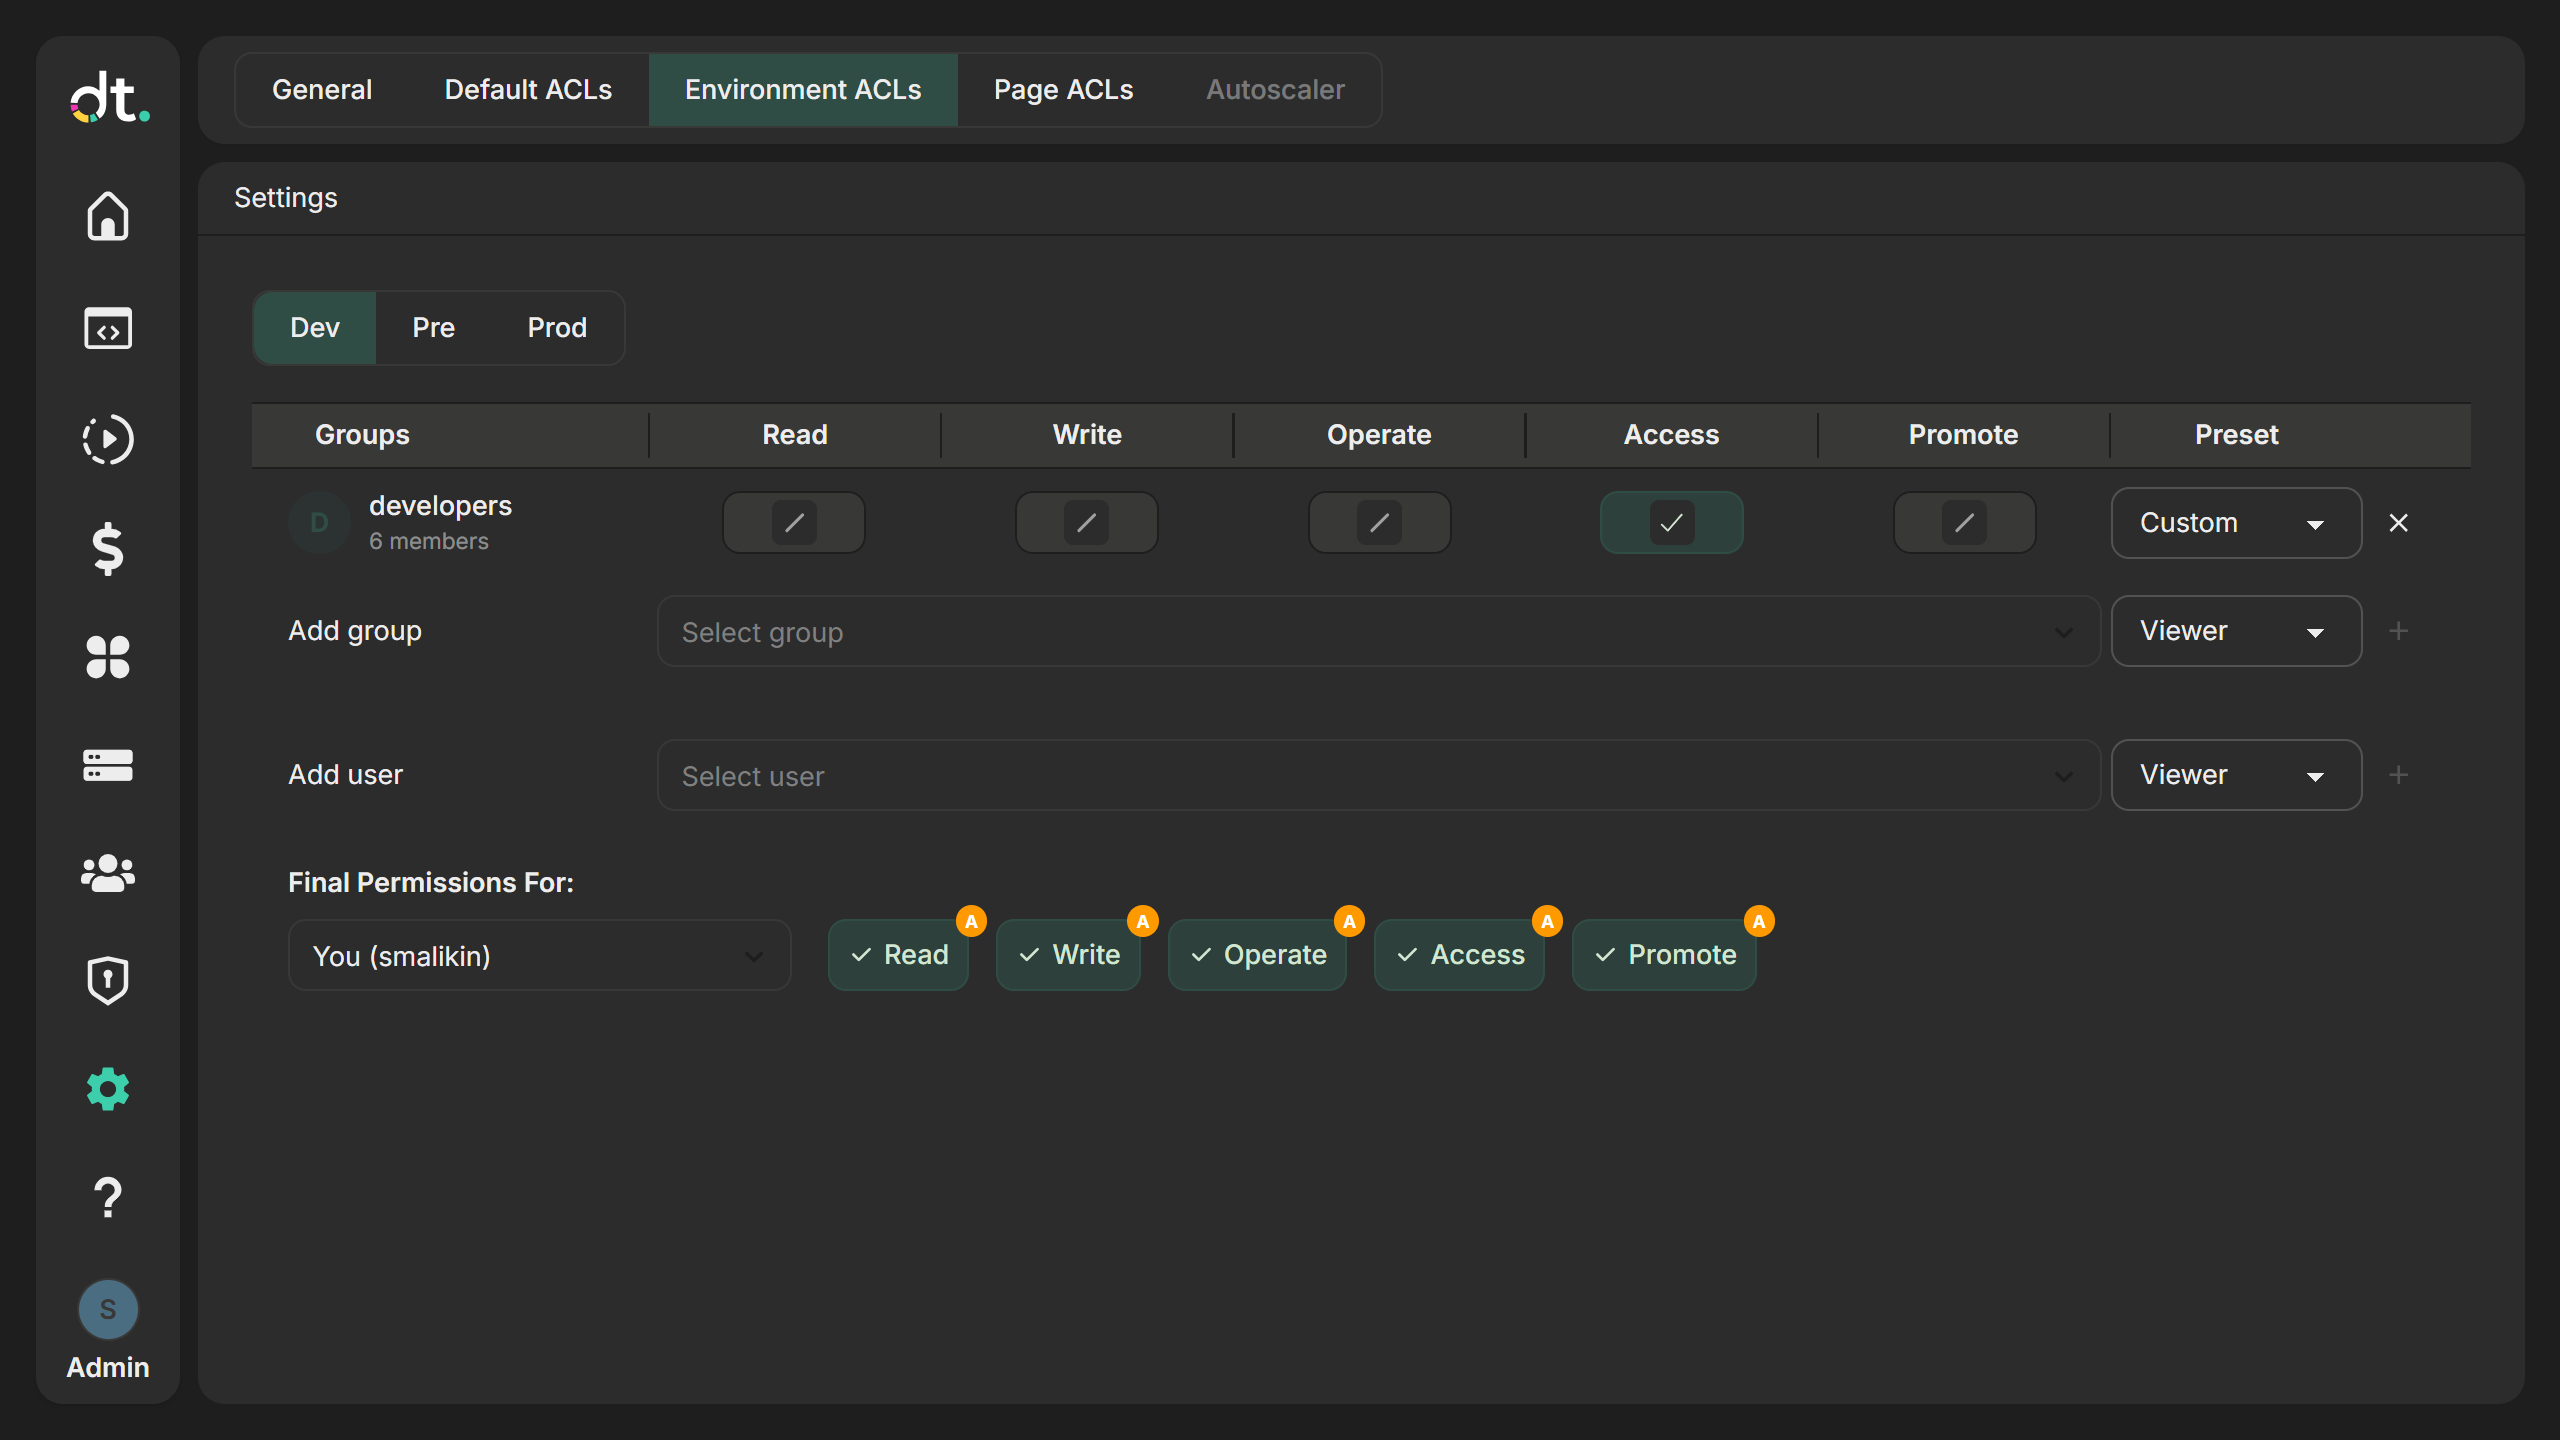
- Groups — Assign groups Read, Write, Operate, Access, and Promote permissions. Use the Preset dropdown (Viewer, Editor, Full access, or Custom) to apply a set.
- Users — Assign the same five permissions to individual users with the same Preset options.
- Final Permissions For — Use the dropdown to select a user and see the effective permissions they have for that environment (including group membership). The badges show which permissions apply and how (e.g. from group or direct grant).
Click Save to apply; Discard to revert.
Page ACLs
Autoscaler
The Autoscaler tab configures per-environment autoscaling for cloud deployments (e.g. max CPUs, minimum idle time, preferable VM families). It has sub-tabs for Dev, Pre, and Prod.
Local deployments
The Autoscaler tab is not available on local deployments. The tab is disabled and shows "Not available on local version." Use it when running on a cloud provider (e.g. AWS, Azure, GCP).
When available, you can set:
- Enabled — Turn autoscaling on or off for that environment.
- Fallback to other families — Allow scaling to VM families other than the preferable ones when needed.
- Max CPUs — Maximum number of CPUs for the environment (integer ≥ 0).
- Minimum idle time — How long a node must be idle before it can be scaled down (duration string).
- Minimum uptime — Minimum time a node must run before it can be scaled down (duration string).
- Scale-up cooldown — Minimum time between scale-up attempts for that environment (at least
1m). Provisioning a VM usually takes 2–3 minutes, so setting this too low can overprovision nodes. - Preferable families — Search and select VM family names to prefer when provisioning (shown as removable chips).
CLI
Settings can also be managed with the dt settings commands. This is useful for scripting and automation.
| Action | Command |
|---|---|
| List all settings | dt settings ls |
| List settings by prefix | dt settings ls <prefix> |
| Get a setting | dt settings get <key> |
| Set a setting | dt settings put <key> <value> |
| Remove a setting | dt settings rm <key> |
| List schemas | dt settings ls-schemas |
| List schemas by prefix | dt settings ls-schemas <prefix> |
| Get a schema | dt settings get-schema <key> |
| Set a schema | dt settings put-schema <key> <value> |
| Remove a schema | dt settings rm-schema <key> |
Common flags:
-p/--pretty— Pretty-print output (e.g. indented JSON).-j/--json— Output as JSON.-v/--include-values— Forls, include values in the listing.-J/--json-enrichened— Forputandput-schema, return the created or updated entity as JSON.-o/--offset— Forlsandls-schemas, start at the given offset (default 0).-b/--batch-size— Forlsandls-schemas, maximum results per batch (default 100).
Examples:
# List all settings
dt settings ls

# List settings with values
dt settings ls -v

# Get a specific setting
dt settings get <key>

# Set a value
dt settings put <key> <value>

# Set a value from a file
dt settings put <key> file:///path/to/file.json

# Default ACLs (e.g. for KV) — key under default_acls/ prefix
dt settings get default_acls/kv
dt settings put default_acls/kv file:///path/to/acl.json

# List and get schemas
dt settings ls-schemas
dt settings get-schema <key>
dt settings put-schema <key> <value>